Getting Started

Installation

Download the Nerdics app from the official homepage, install the software for your operating system, then register or sign in to start using it.

Guide
Choose the installer that matches your device and meets the platform requirements below.
Run the downloaded installer, finish the installation steps, and launch Nerdics.
Register a new account or sign in with an existing account to enter the product workspace.

What this solves

This guide helps developers use Nerdics installation as part of an AI backend delivery workflow instead of treating generated code as an unverified output.

When to use it

Use it when a generated backend needs to be inspected, executed, repaired, documented, deployed, or monitored by the team responsible for the software.

Step-by-step workflow

Download the installer, launch the app, sign in, create or select a project, and let Nerdics check the runtime environment before generating backend code.

Expected result

The team has a working Nerdics workspace ready for AI backend generation, sandbox execution, API docs, and deployment.

Common issues

Most issues come from incomplete requirements, missing runtime configuration, unclear data models, or API behavior that has not been validated with logs and documentation.
Mac

Requires a Mac with Apple Silicon.

Download for Mac (Apple Silicon)
Windows

Requires Windows 10 version 1709 or later with WSL support.

Download for Windows (x64)

Quick Start

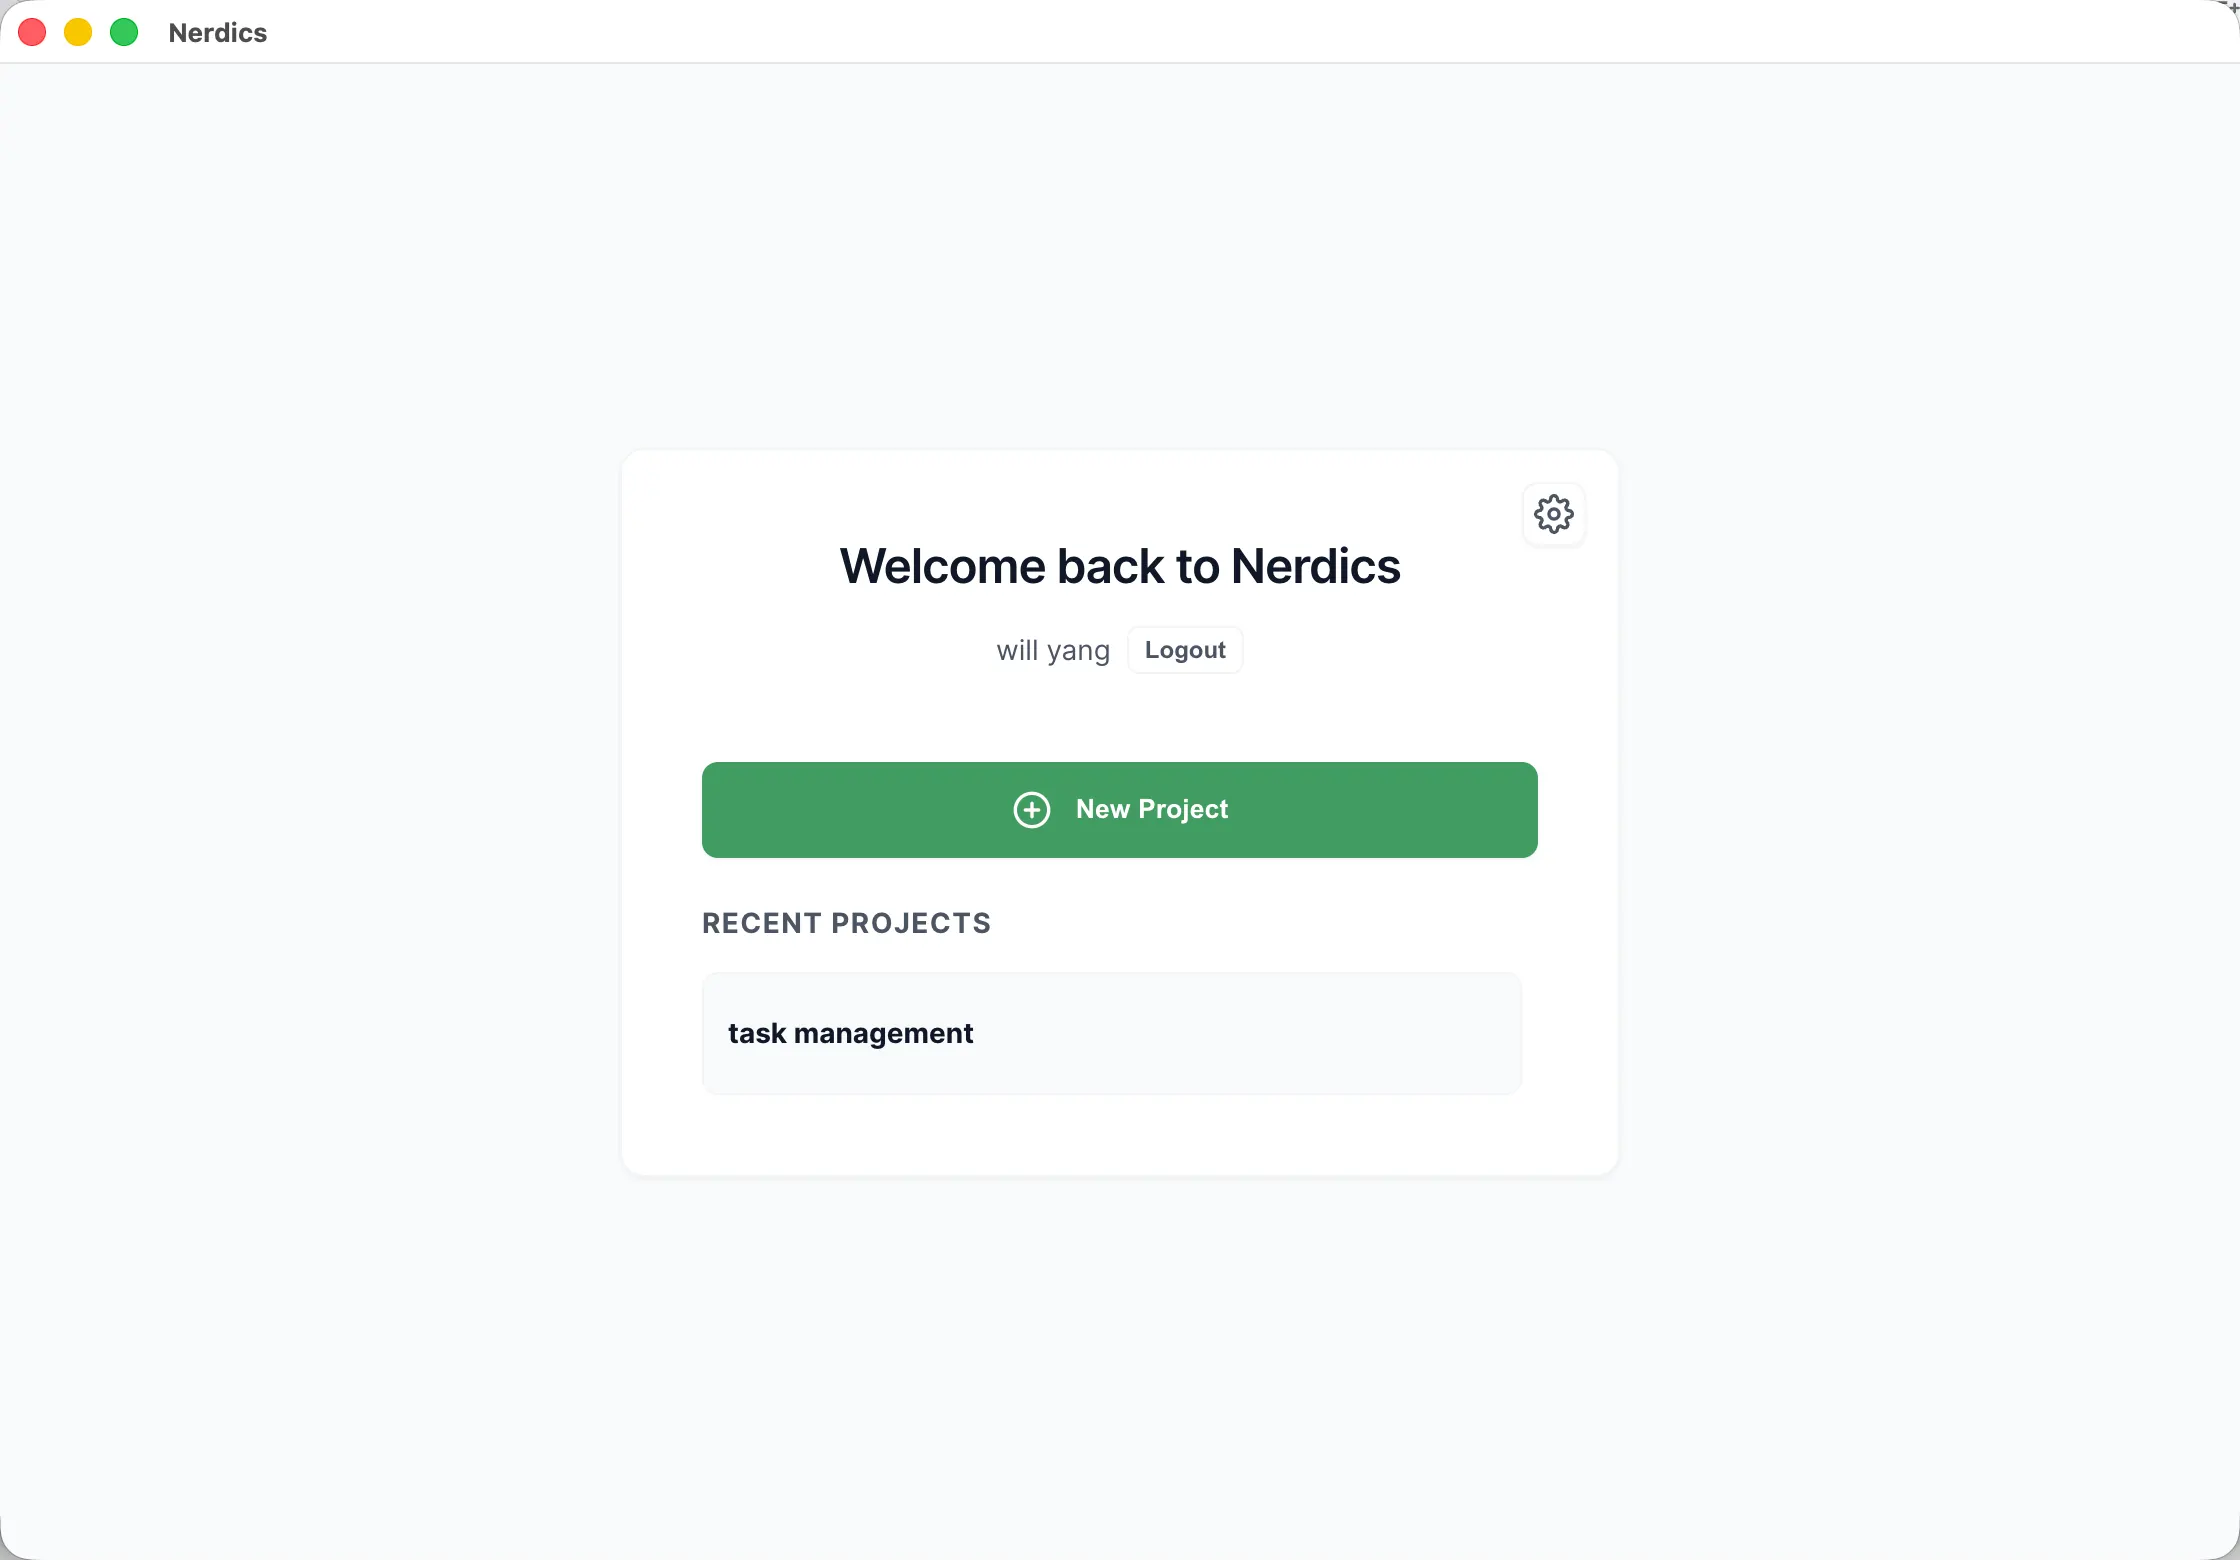
After installing Nerdics, sign in through console.nerdics.com, return to the desktop app, and open a project to enter the main workspace.

Guide
Open the Nerdics desktop app and click Log in.
Sign in on console.nerdics.com with Google or GitHub.
Create a project or select an existing project, then wait for the runtime environment check to finish.

What this solves

This guide helps developers use the Nerdics quick start as part of an AI backend delivery workflow instead of treating generated code as an unverified output.

When to use it

Use it when a generated backend needs to be inspected, executed, repaired, documented, deployed, or monitored by the team responsible for the software.

Step-by-step workflow

Create a backend from a prompt, review the generated flow, run it in the sandbox, inspect API docs, and deploy only after the generated backend behaves as expected.

Expected result

A developer can move from prompt to running backend system while preserving visibility into source code, logic, logs, and deployment state.

Common issues

Most issues come from incomplete requirements, missing runtime configuration, unclear data models, or API behavior that has not been validated with logs and documentation.
1

Open Nerdics

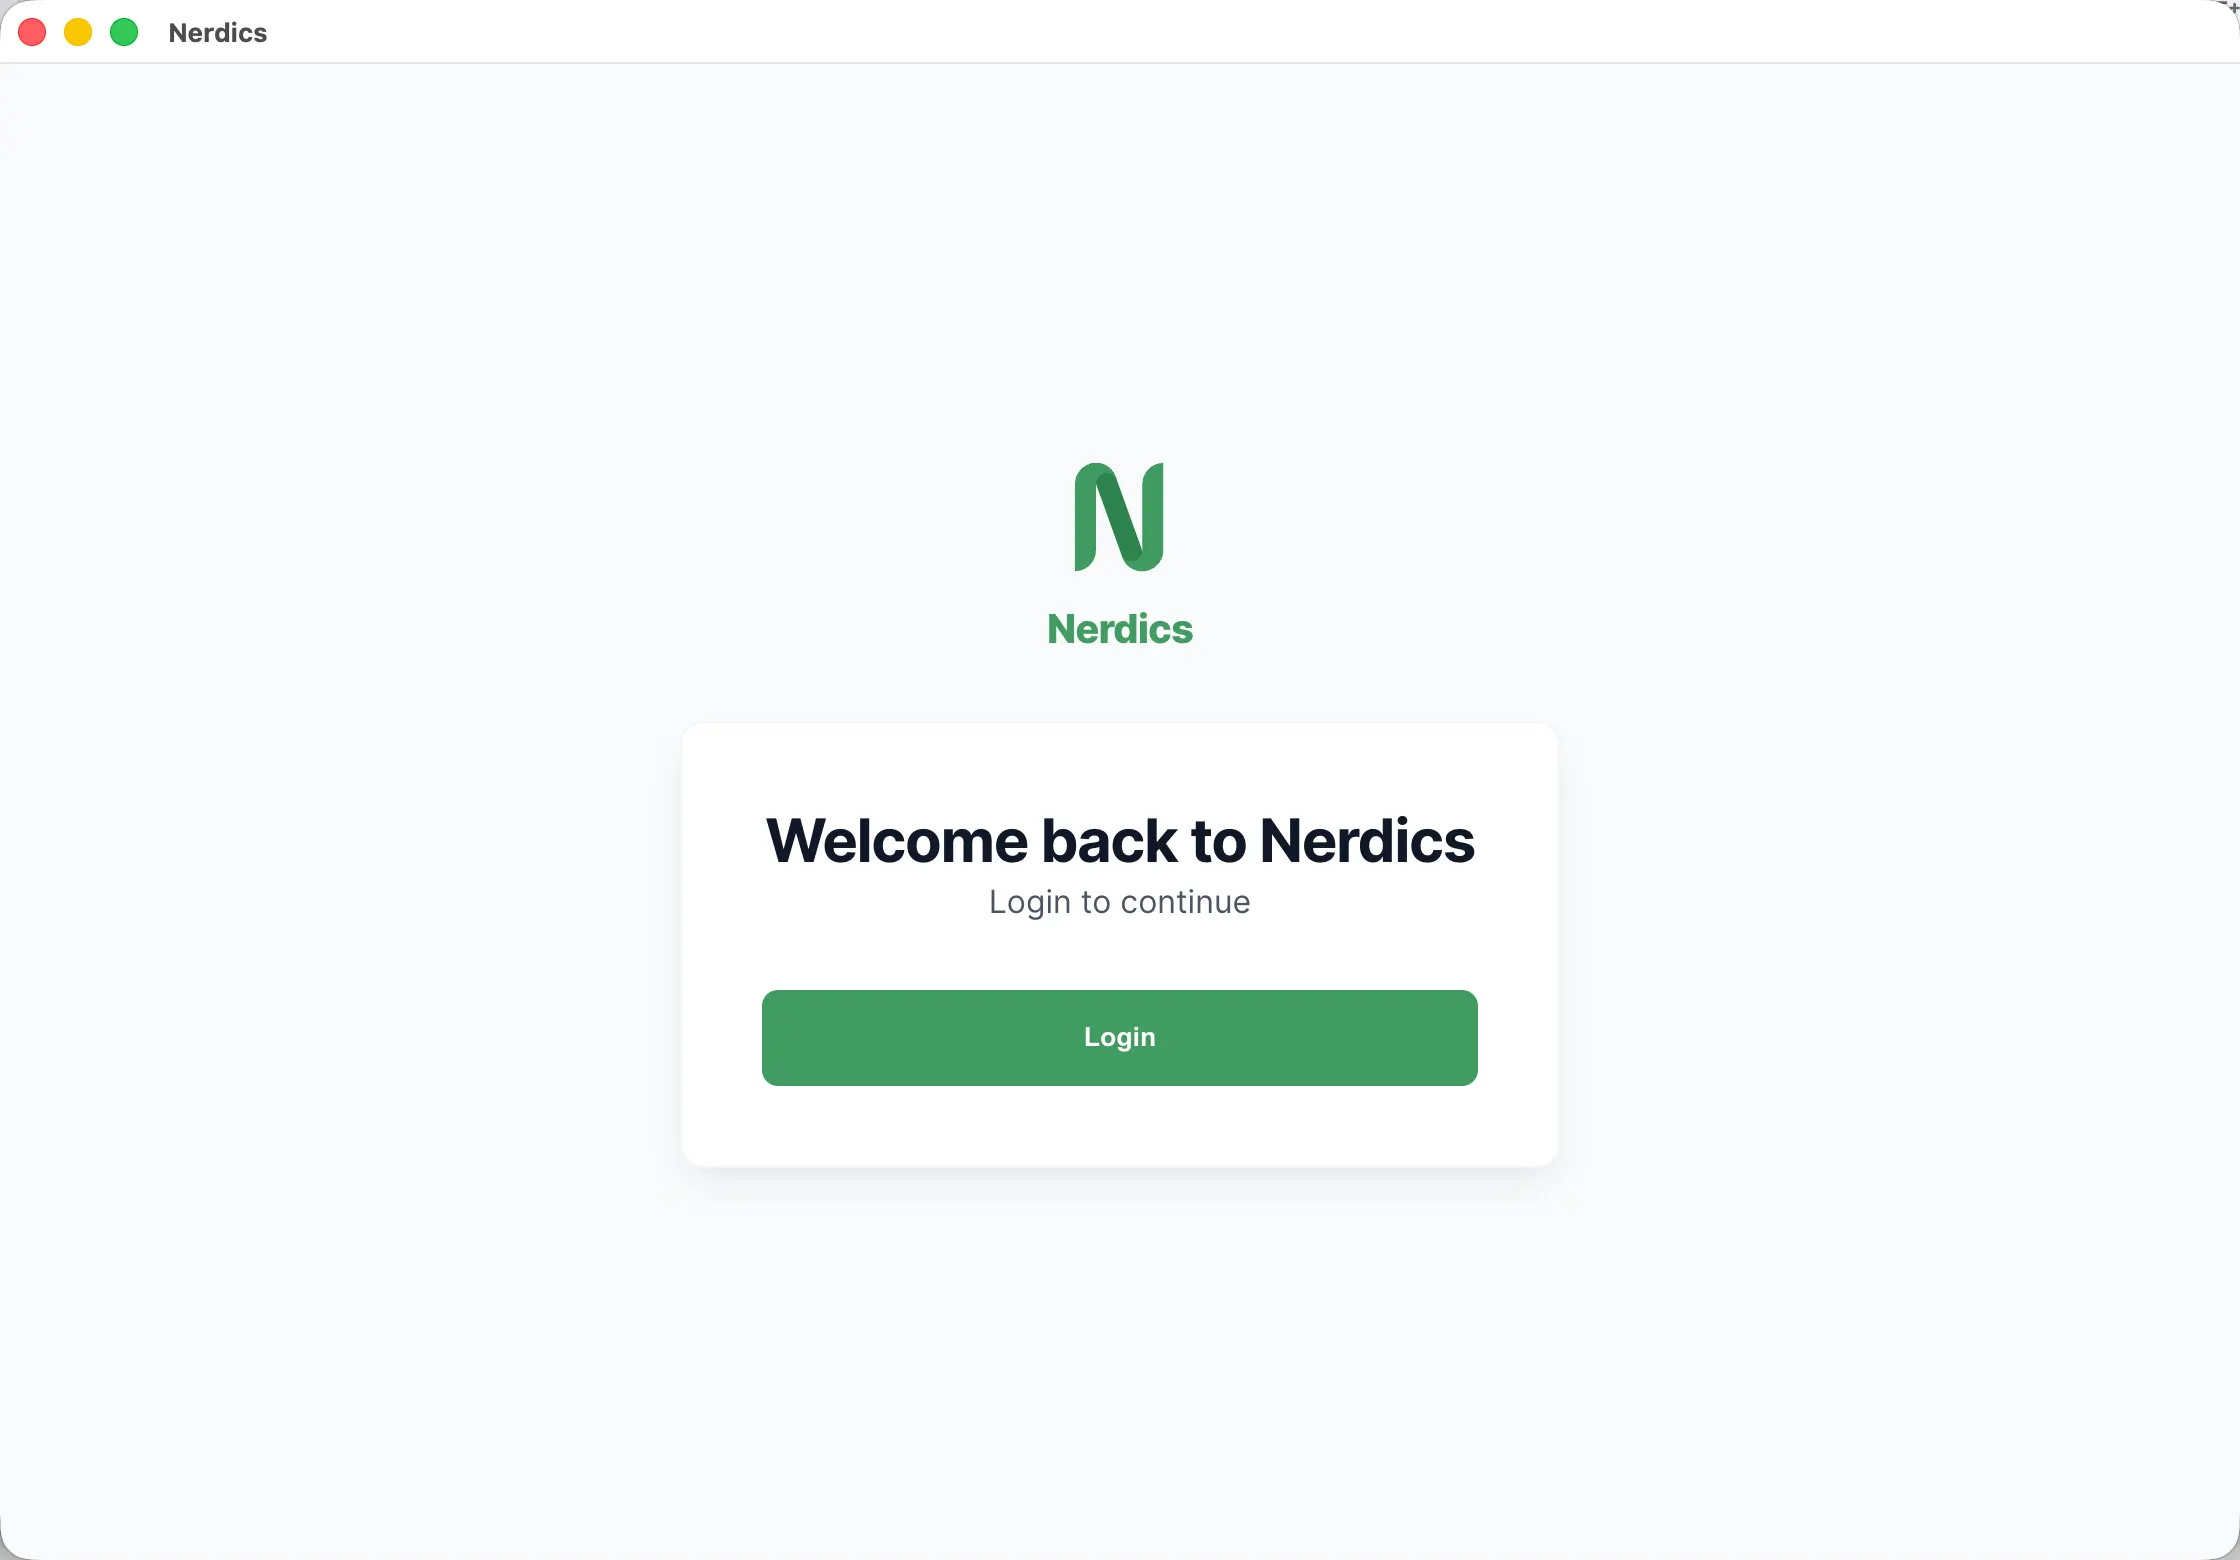
After installing Nerdics, launch the desktop app. You will see the start screen and can click Log in to continue.

Nerdics start screen before login
2

Sign in with Google or GitHub

Clicking Log in opens console.nerdics.com. Nerdics currently supports third-party sign-in with Google and GitHub accounts. After sign-in succeeds, the browser automatically opens Nerdics again.

Nerdics logged-in project selection screen
3

Create or open a project

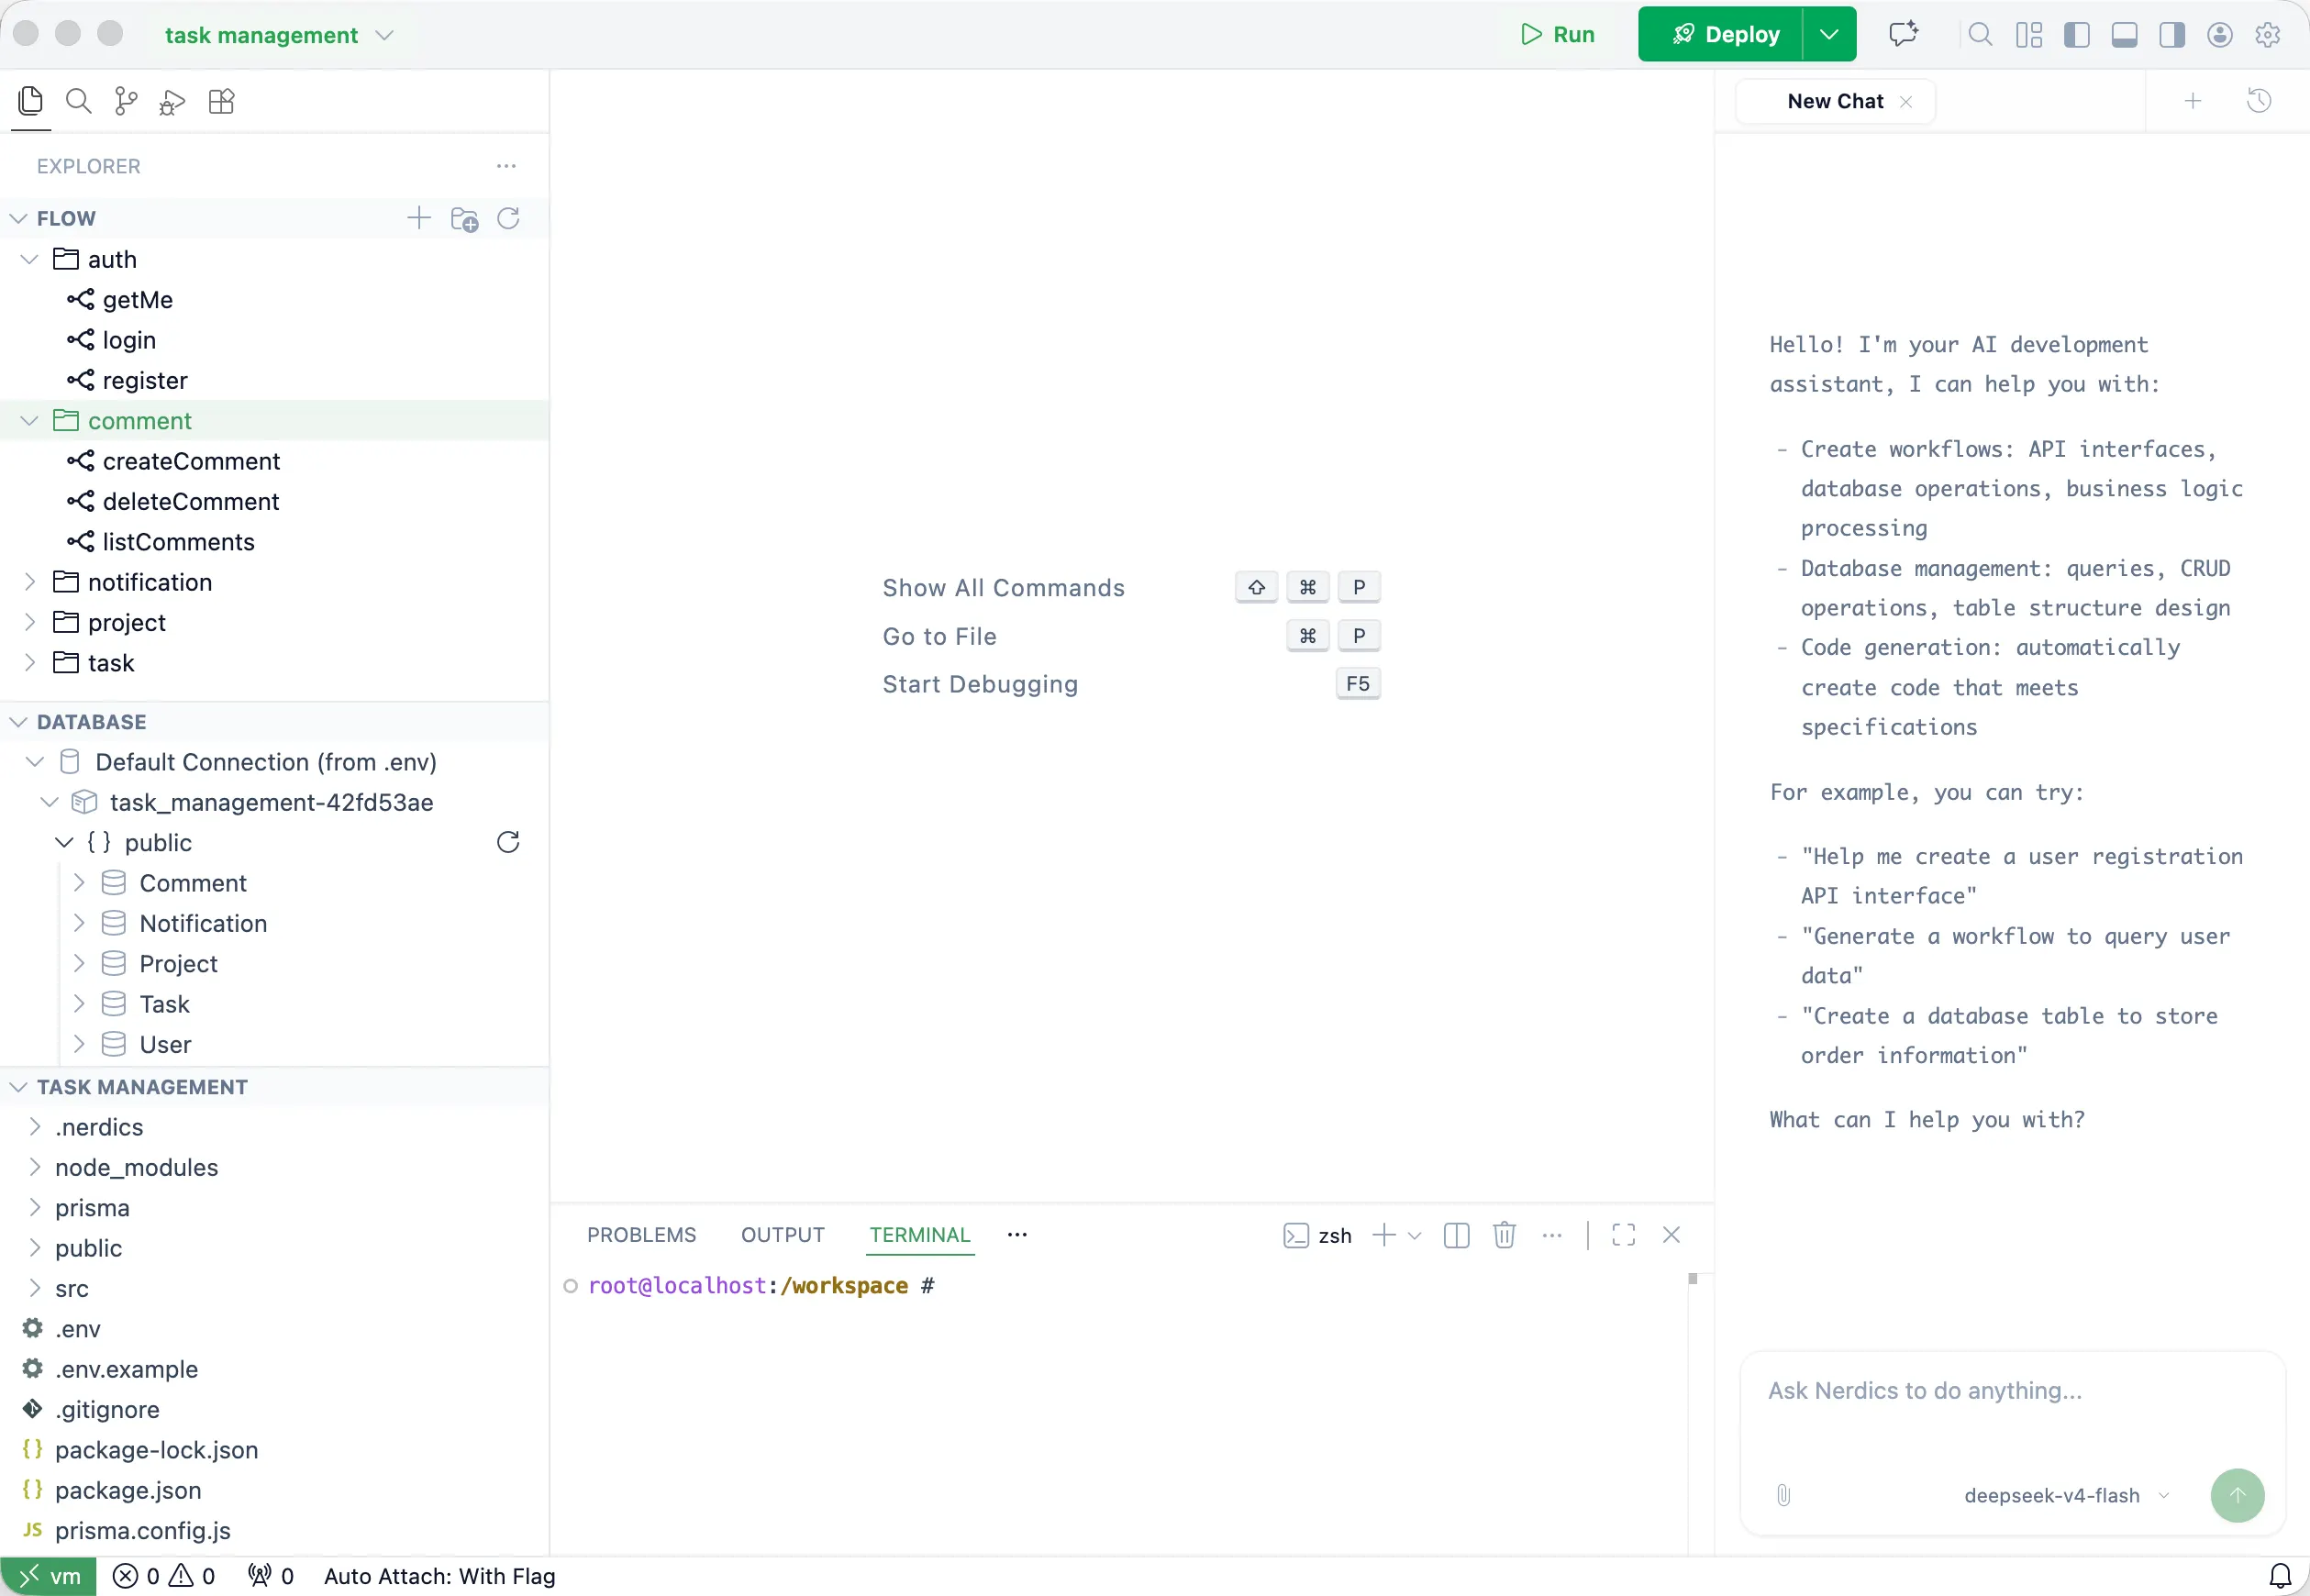
Create a new project or choose an existing project from the list. When you click a project, Nerdics checks the runtime environment and then enters the main workspace.

Nerdics main workspace after selecting a project

Main Workspace Areas

These areas make up the main Nerdics workspace after a project is opened.

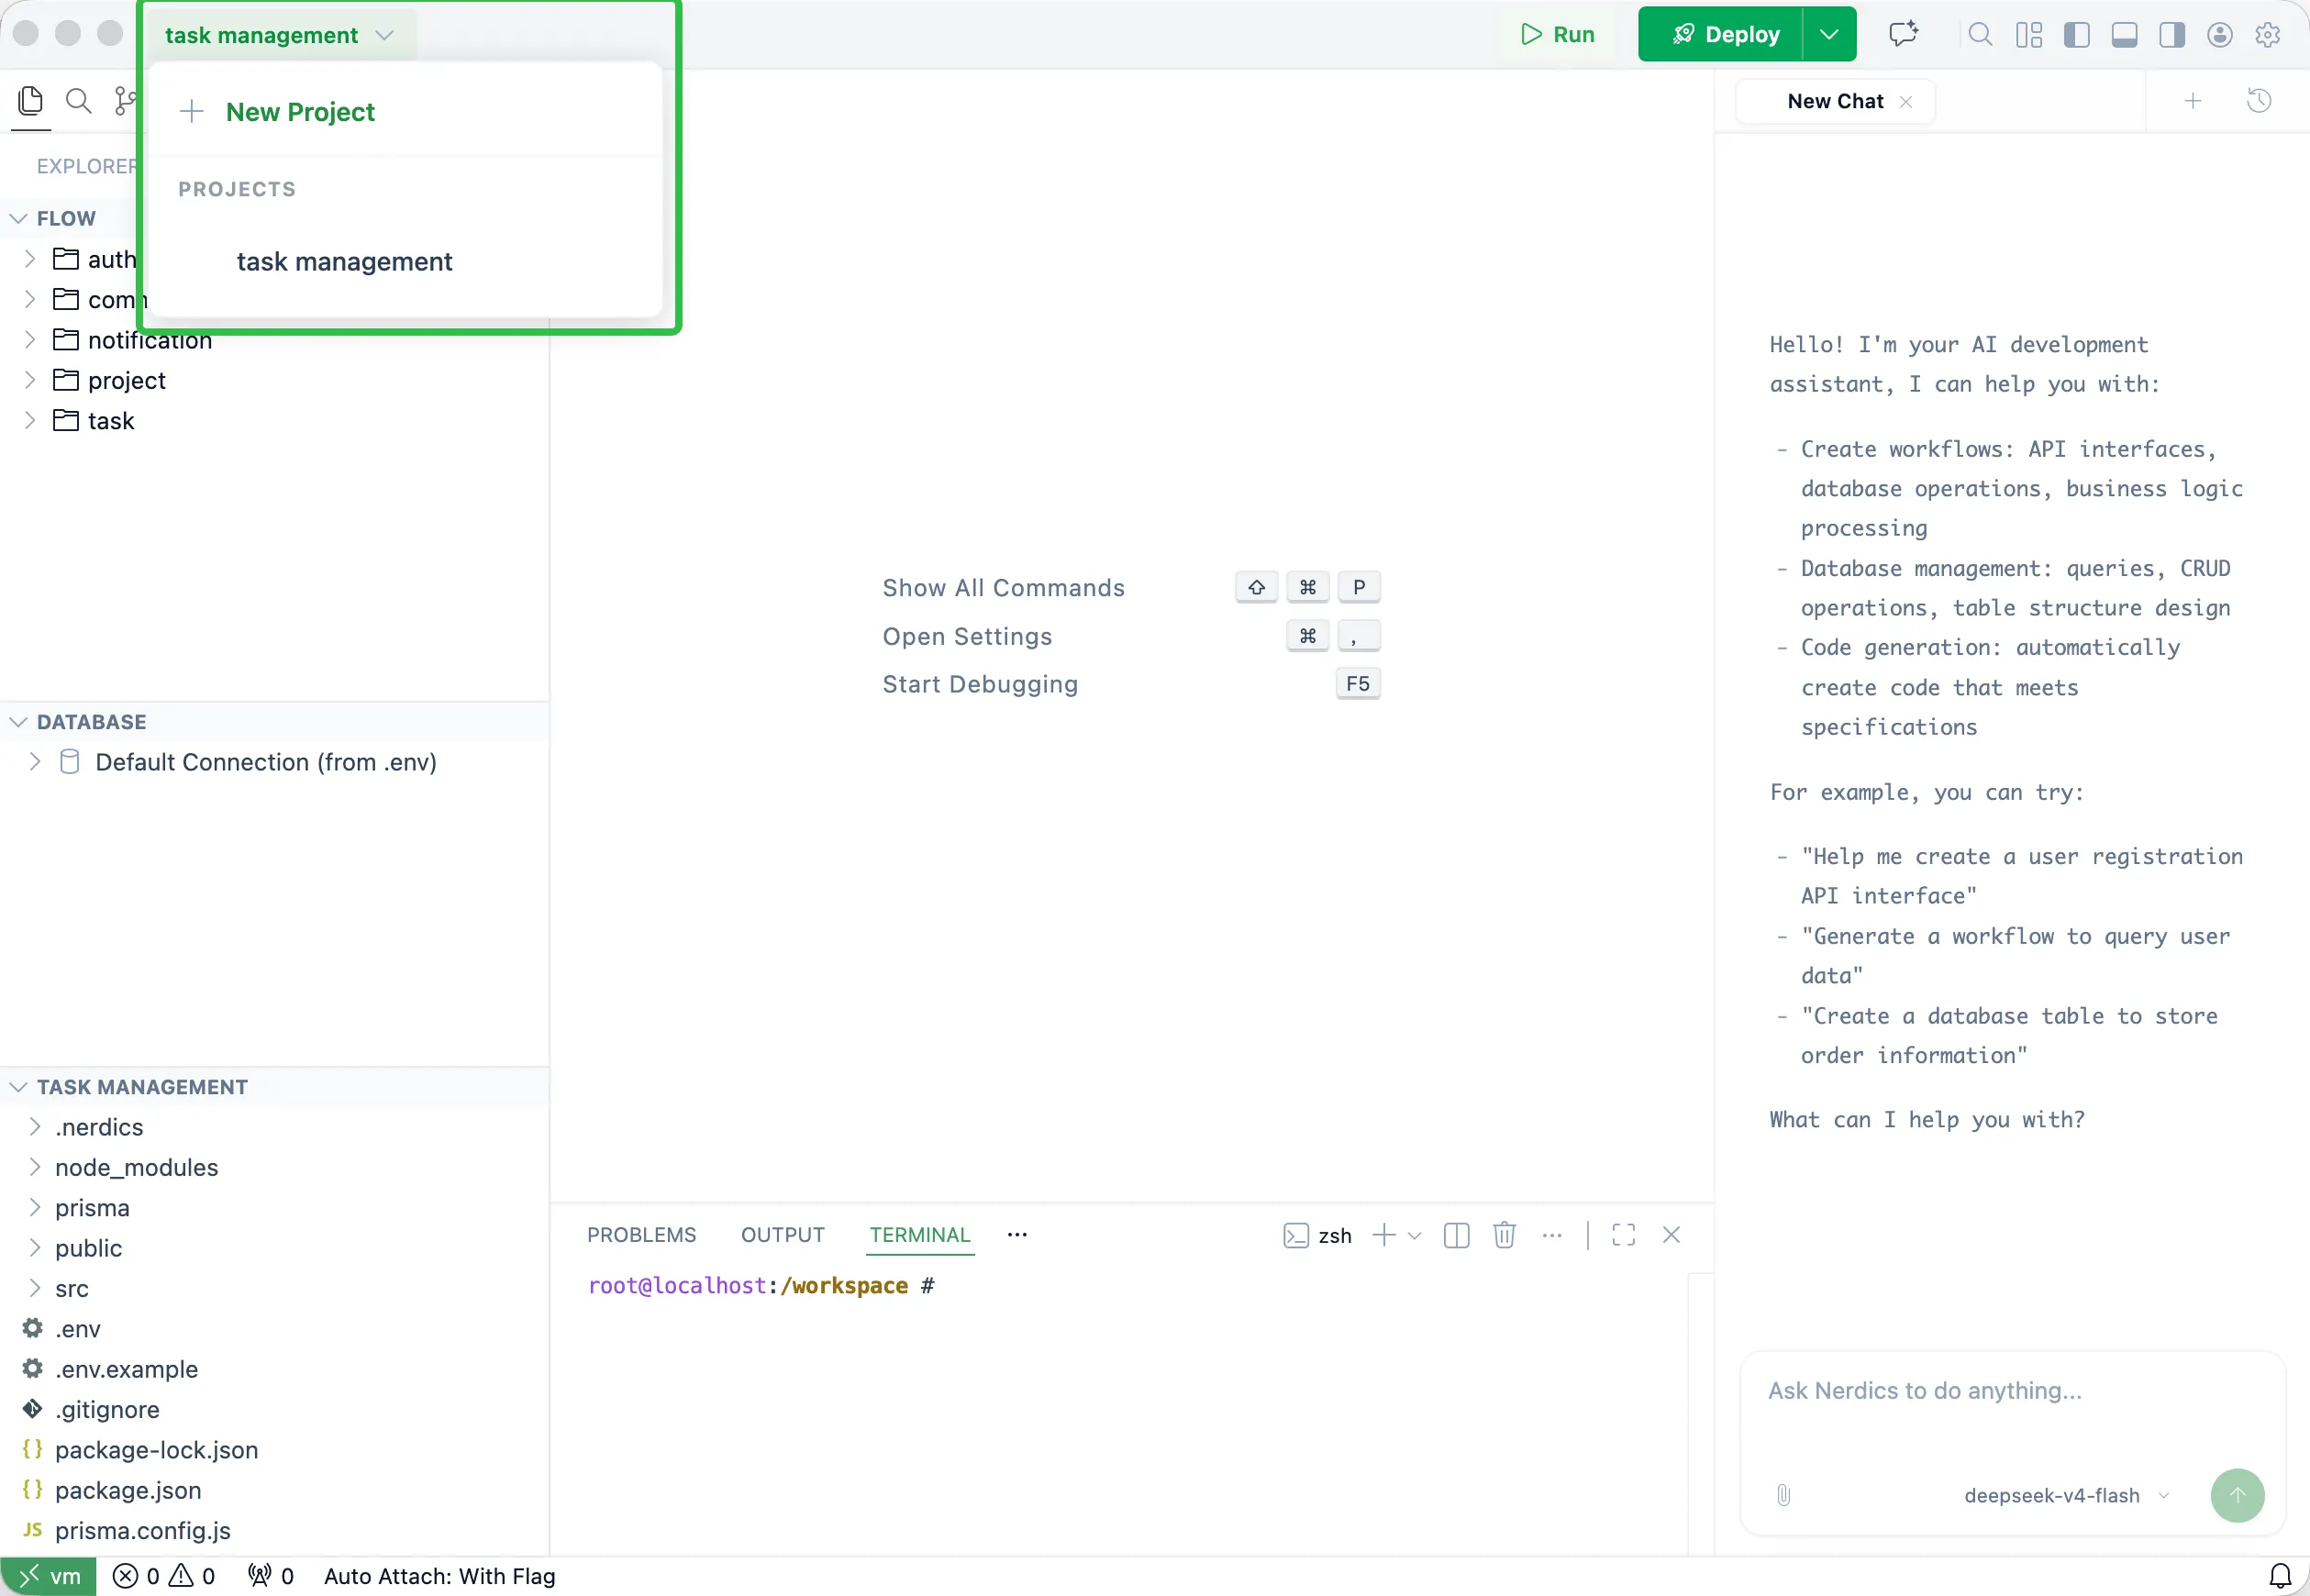
Project Area

Use the project area to switch between projects, create a new project, and adjust settings for each project.

Nerdics project switcher and project controls

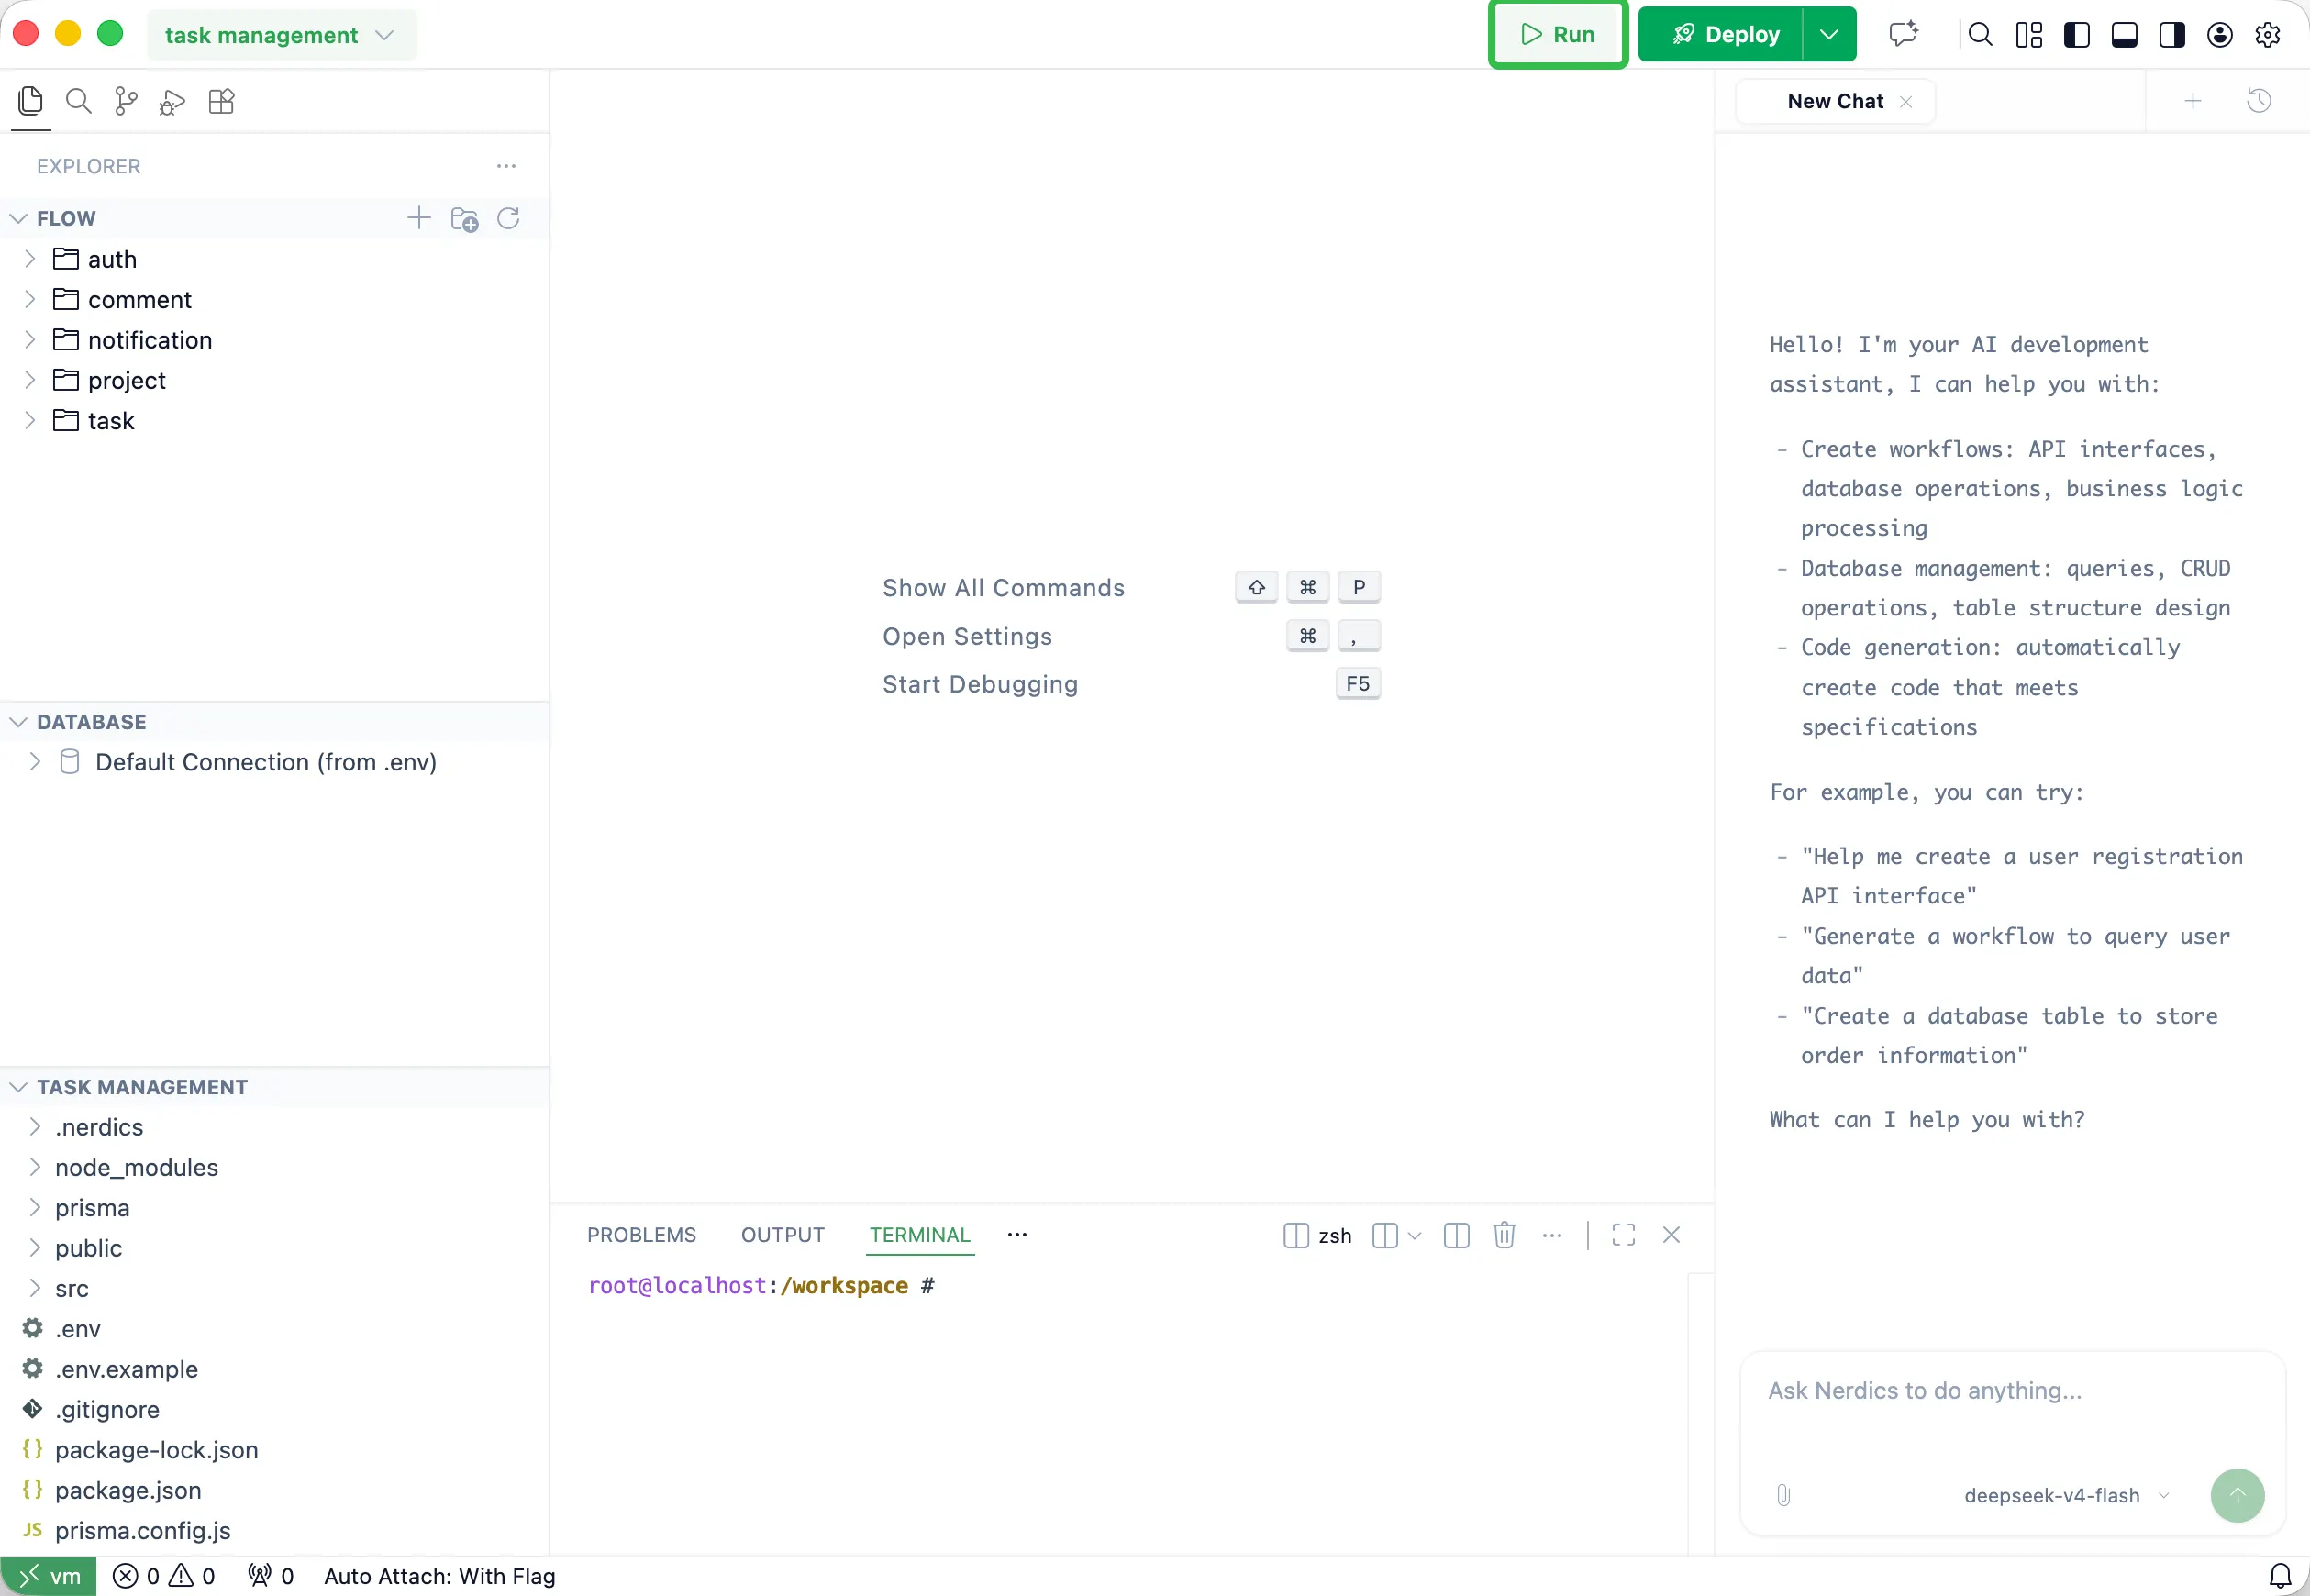
Debug Controls

Use the Debug model to run the project locally. Click Run to start the project in debug mode, then debug with breakpoints in the project source code.

Nerdics debug controls before running a project

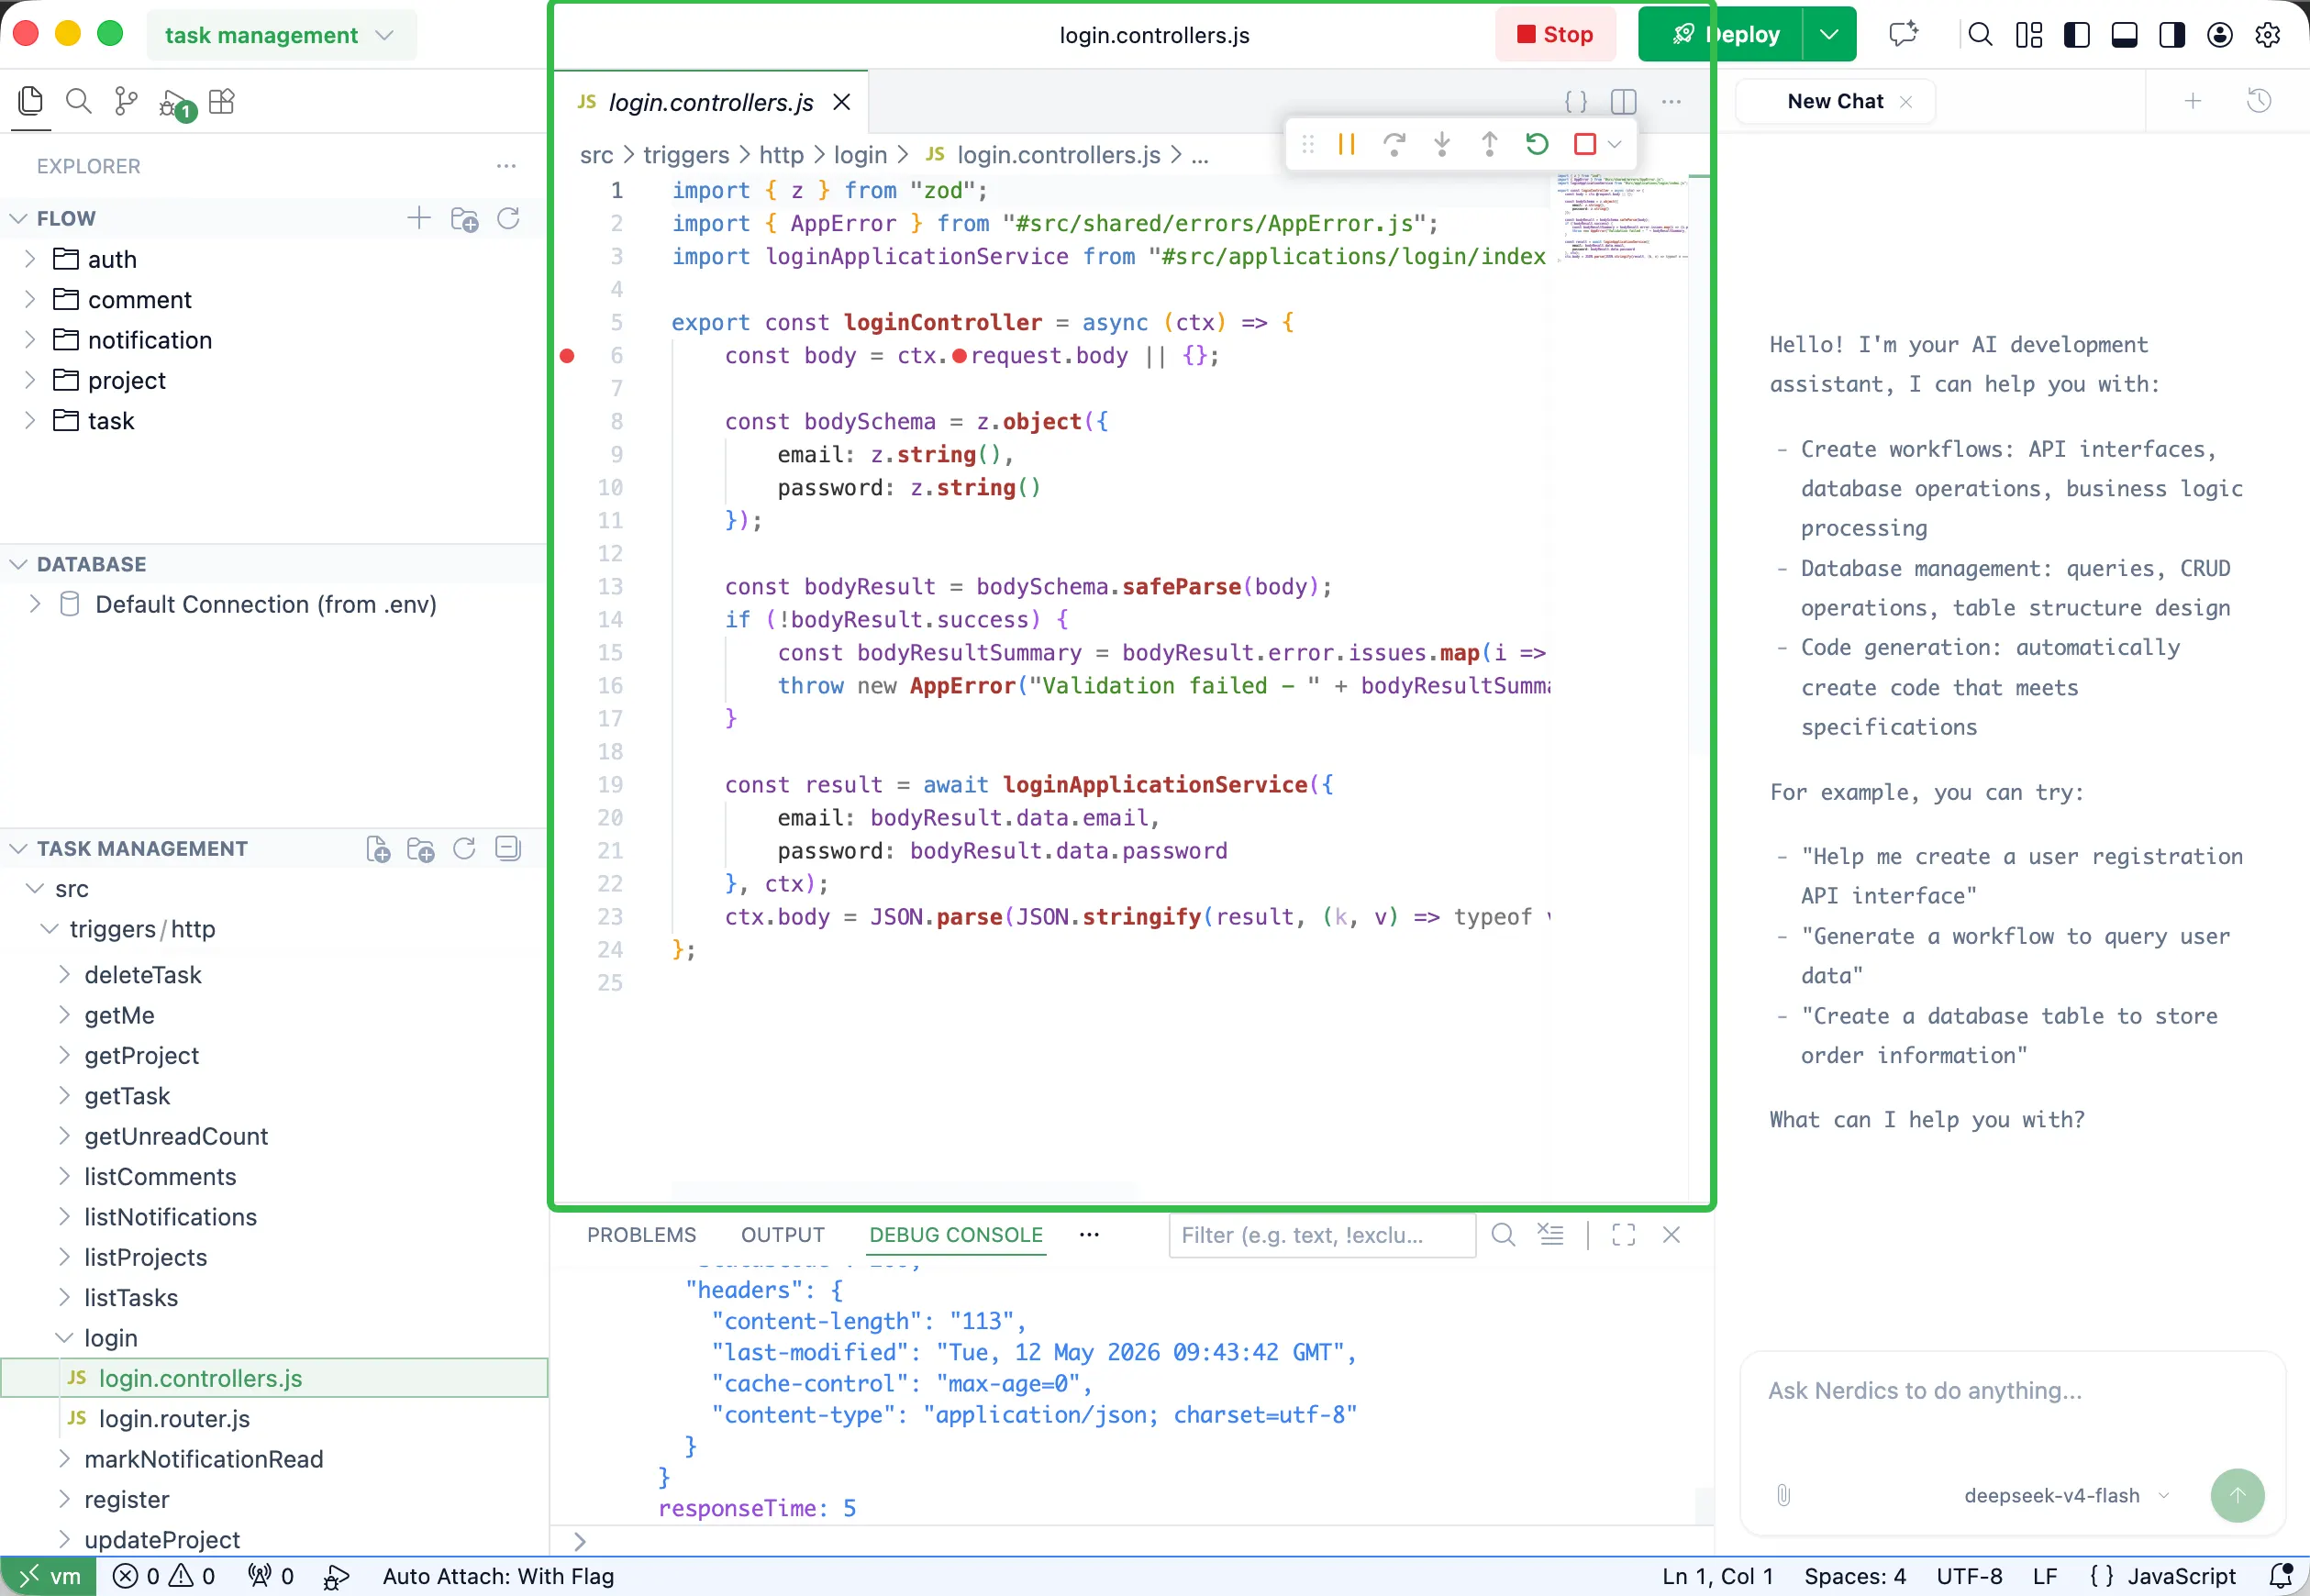
Debug Runtime Area

After a debug run starts, this area shows the running debug session and runtime feedback for the current project.

Nerdics debug runtime area after running a project

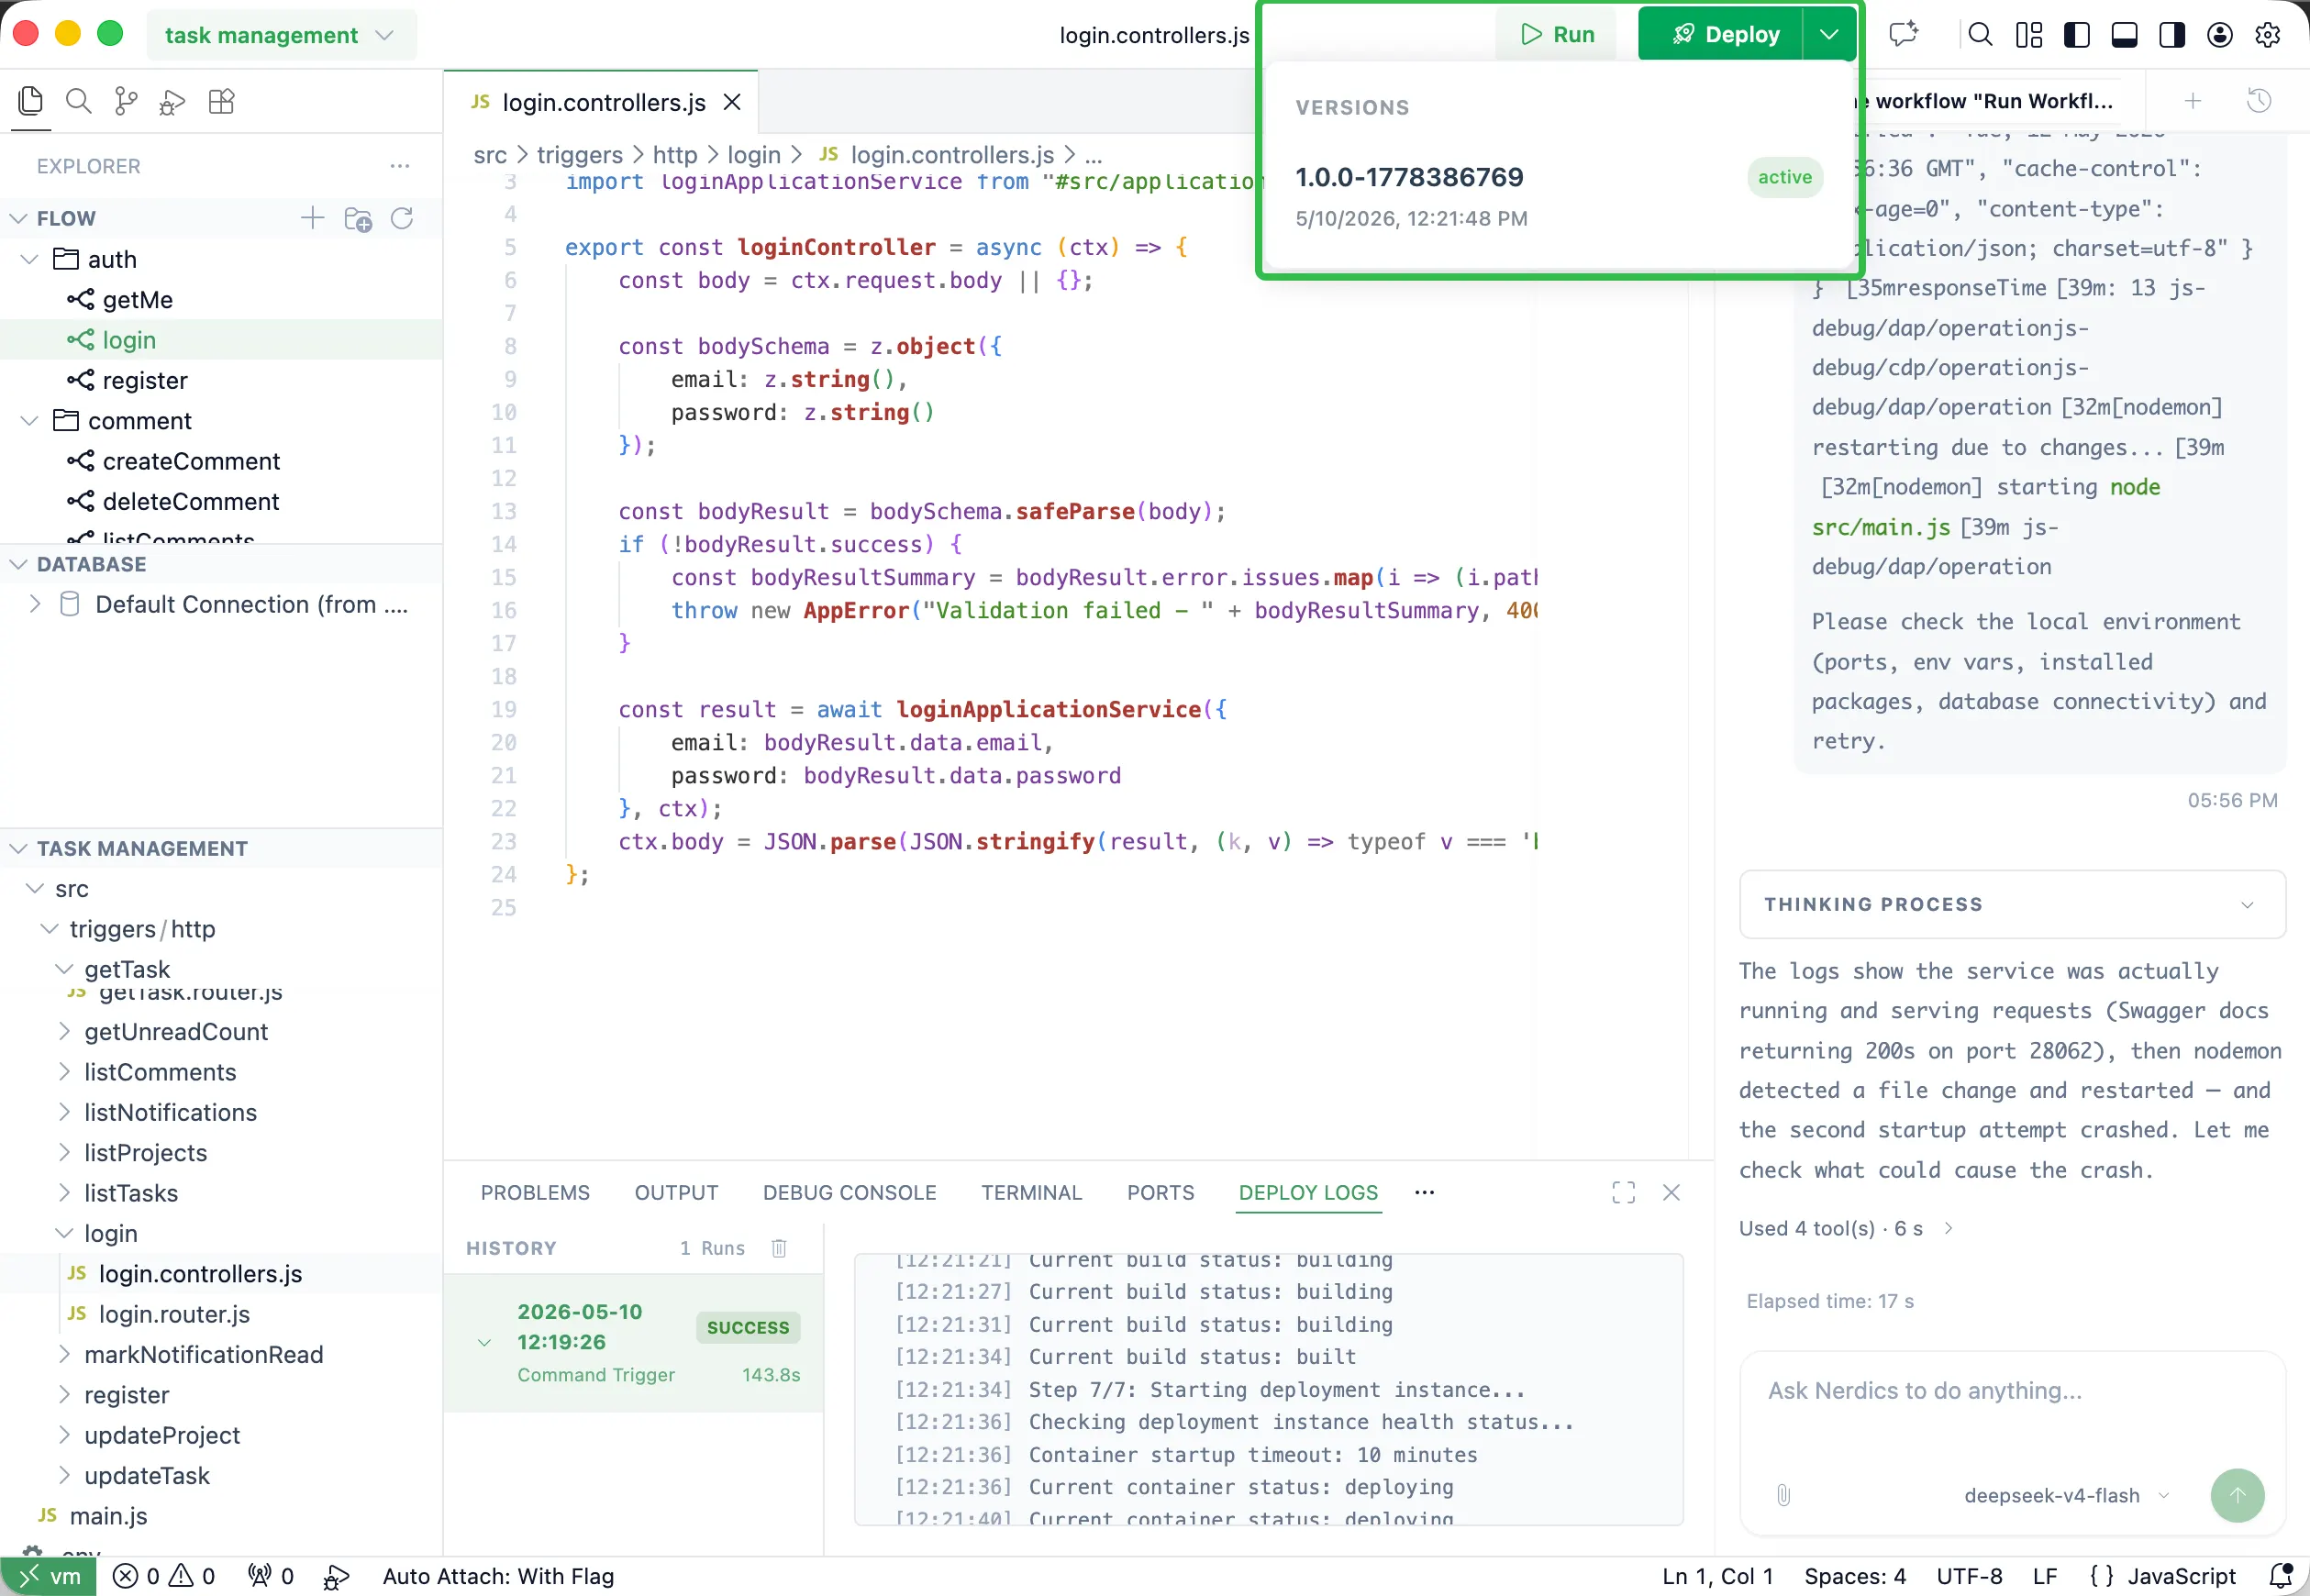
Deploy Area

Open the arrow beside Deploy to quickly redeploy a historical version. Clicking Deploy starts an automatic online deployment, and Nerdics opens the online API Docs when deployment finishes.

Nerdics deploy menu with deployment history

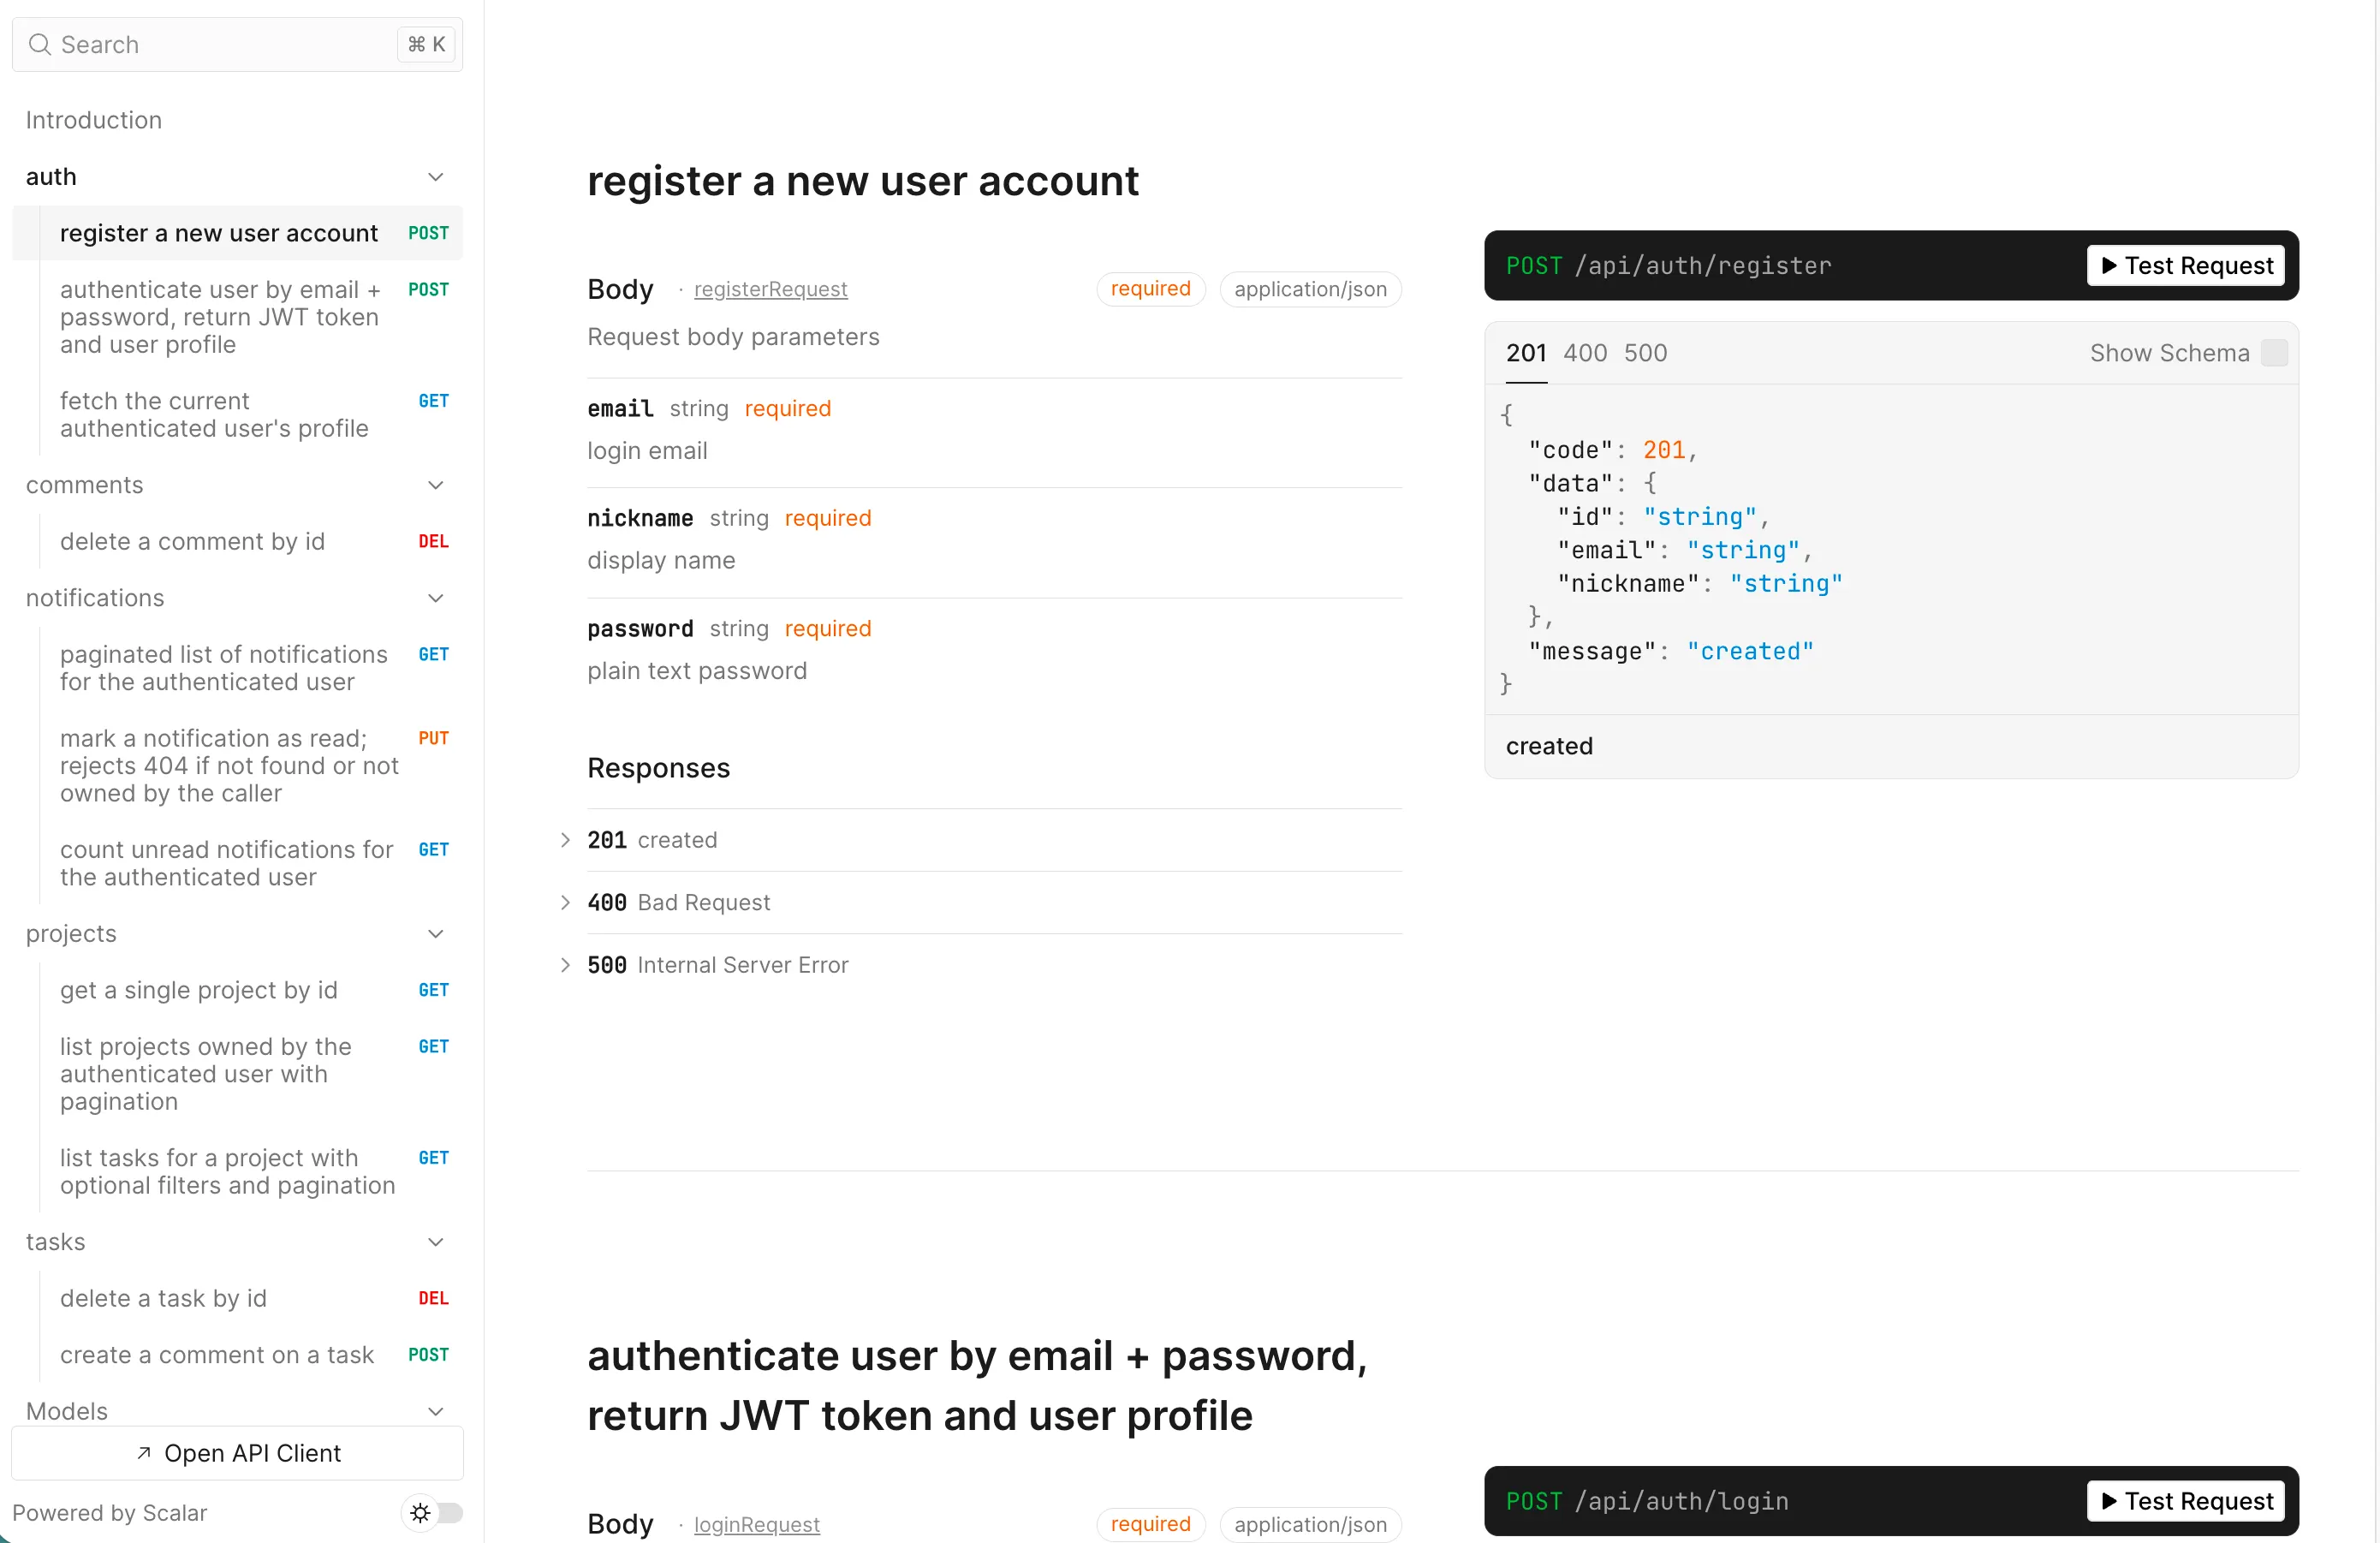
API Docs

API Docs contains every API built for the project. You can inspect and test all APIs online from this page.

Nerdics online API documentation and API testing page

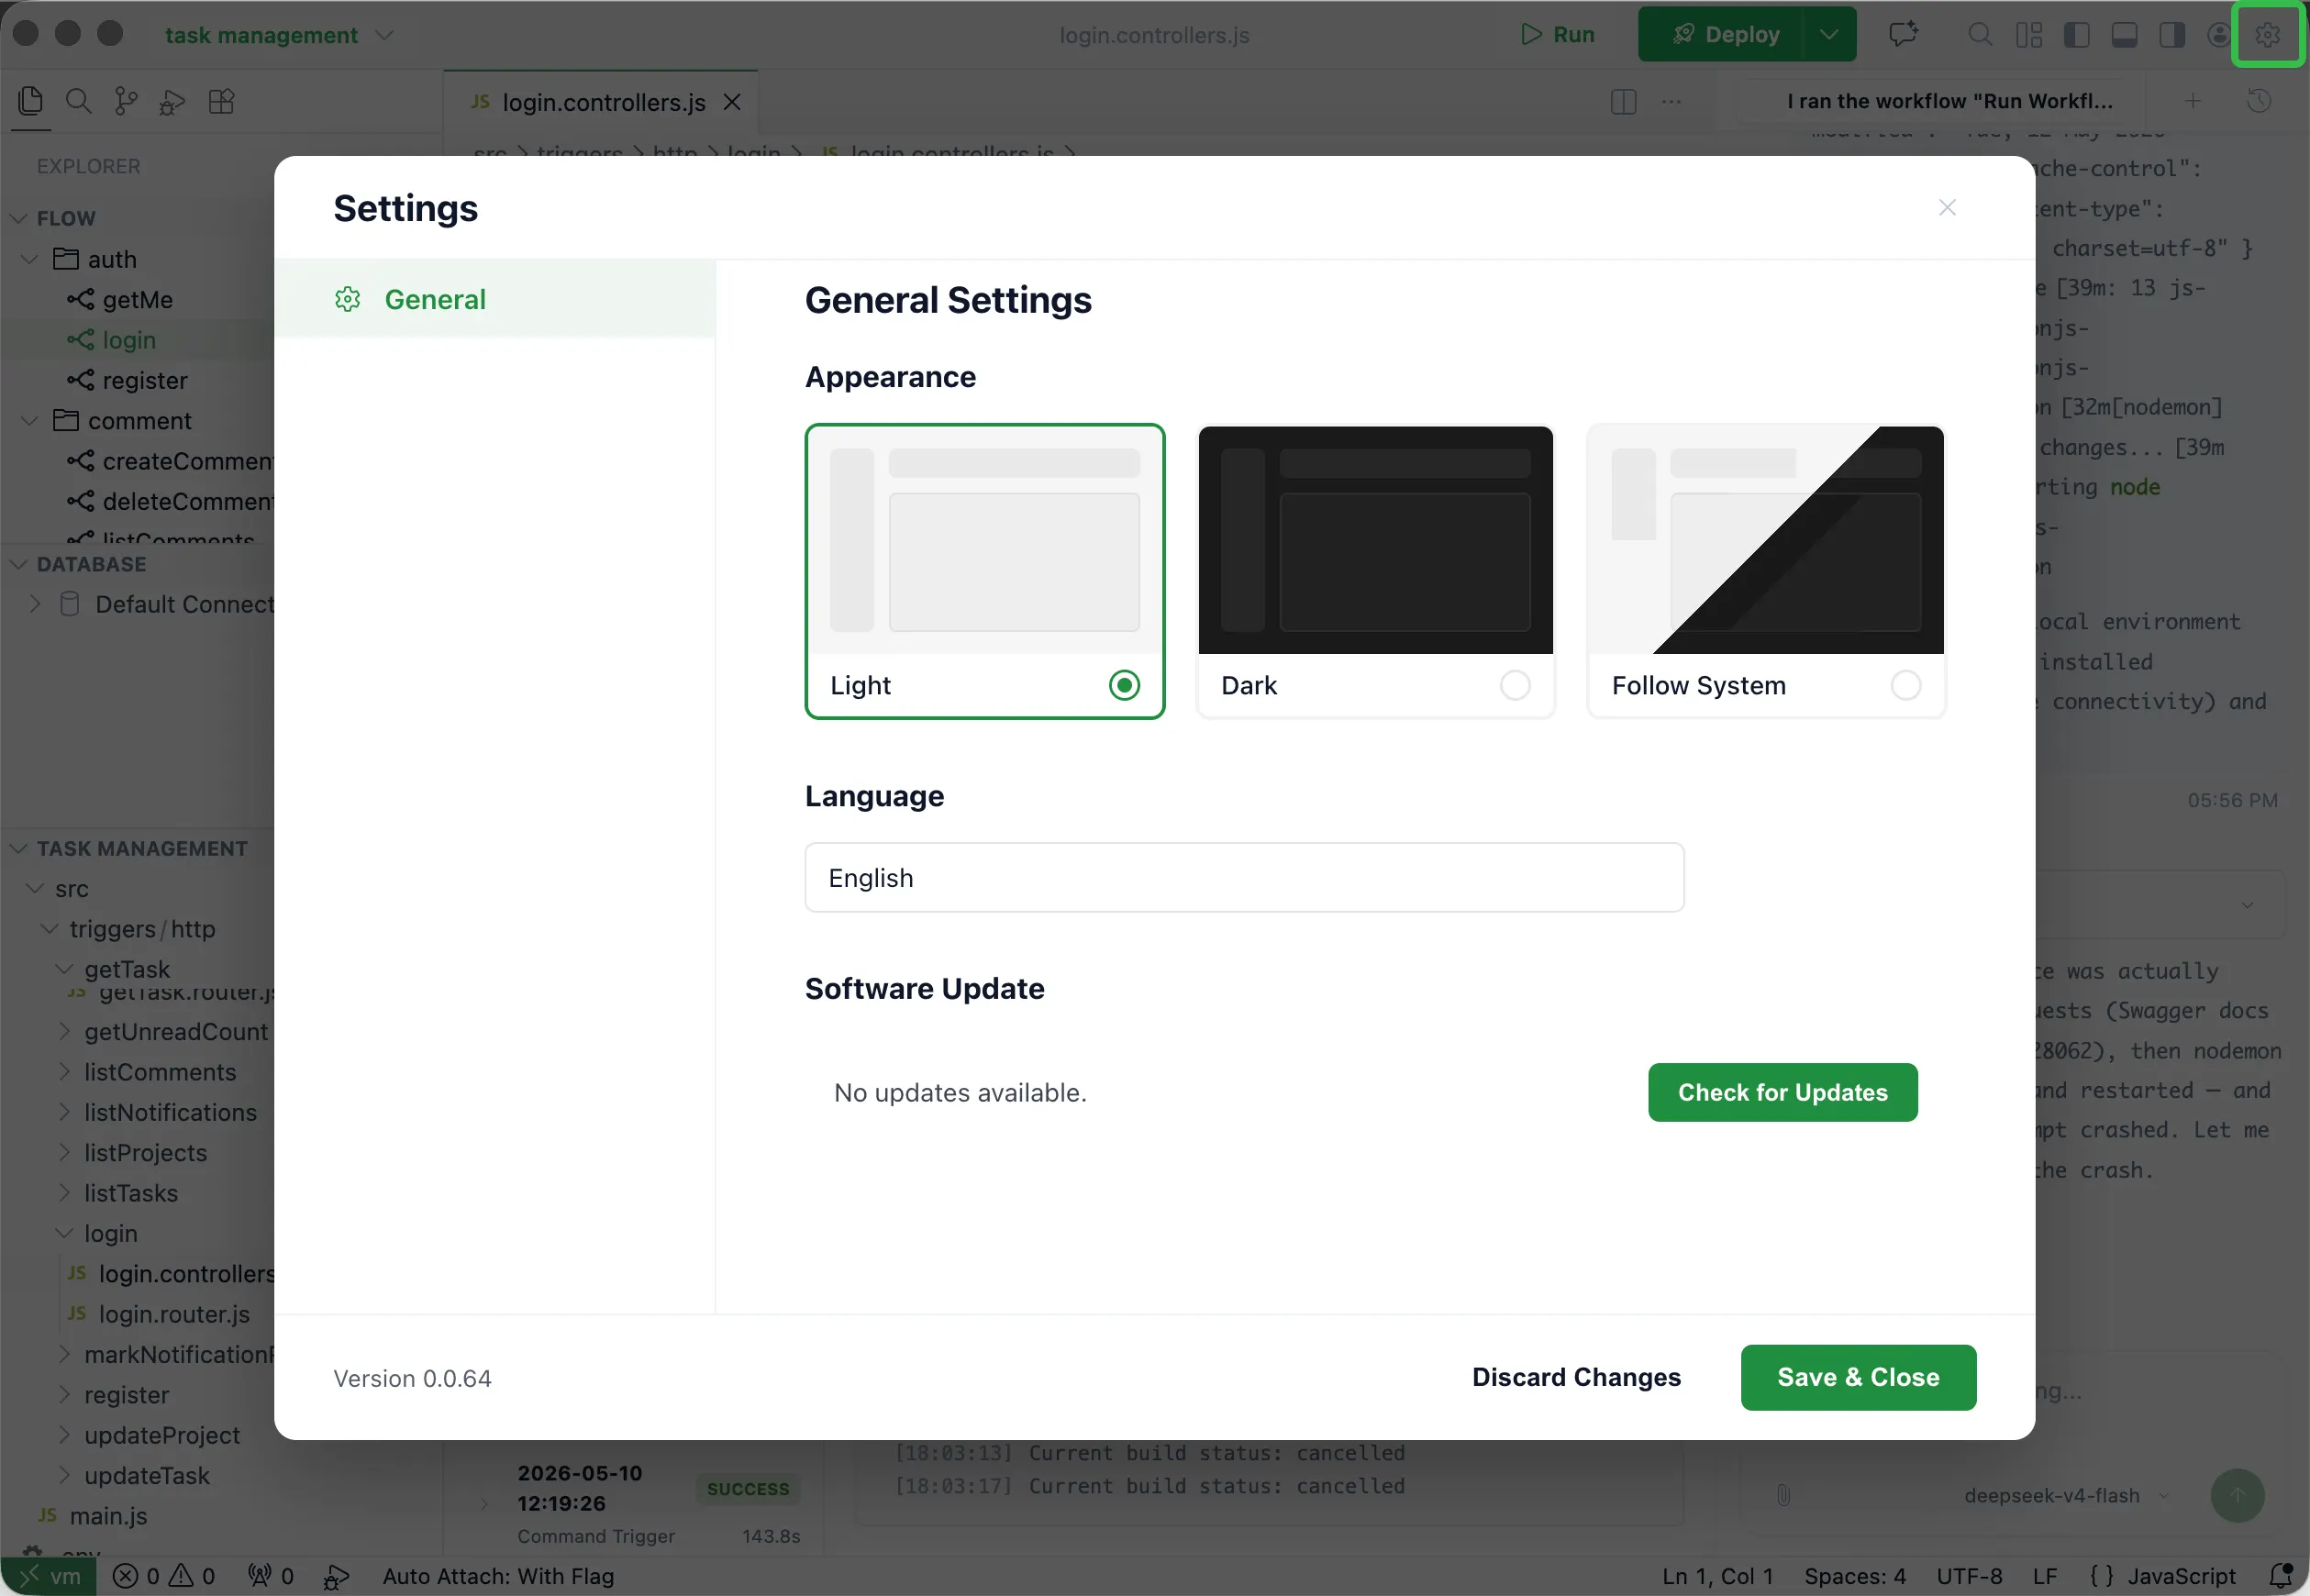
Settings

Use Settings for general preferences, including checking for updates, changing language, and switching theme.

Nerdics settings screen

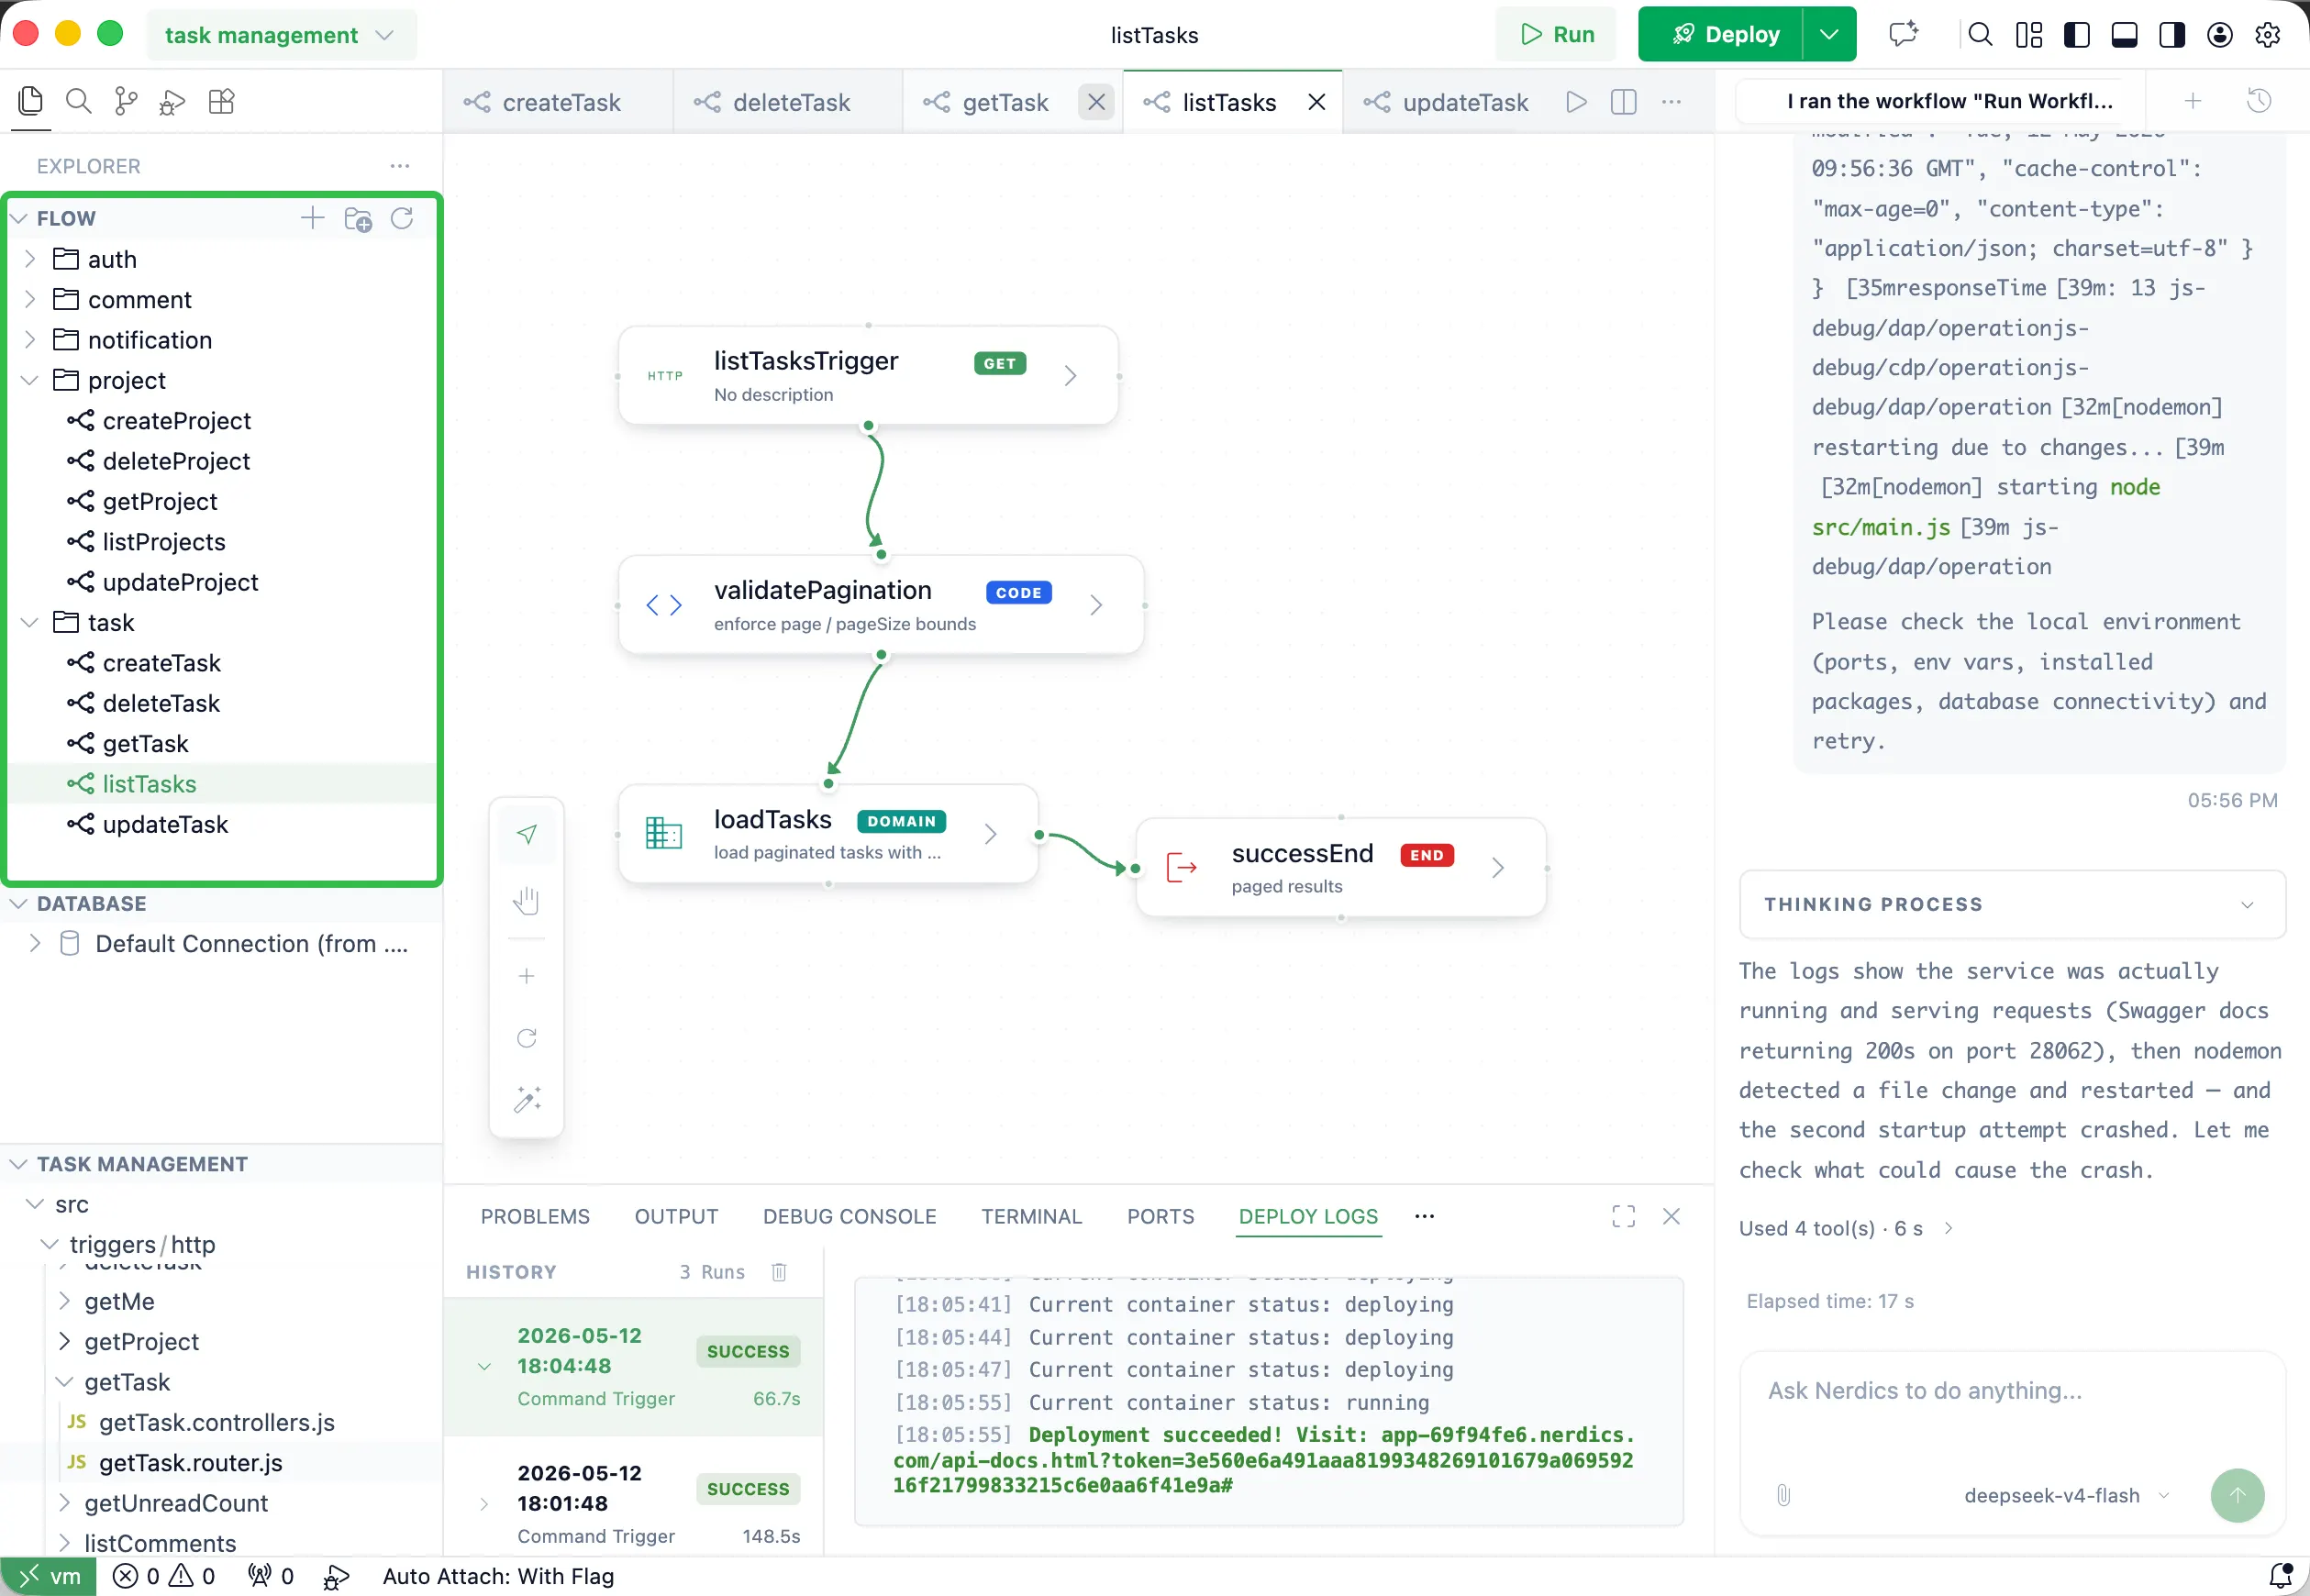
Flow Area

The Flow area lists all flows by functional category. Click a flow to visualize its details on the right.

Nerdics flow list and visual flow area

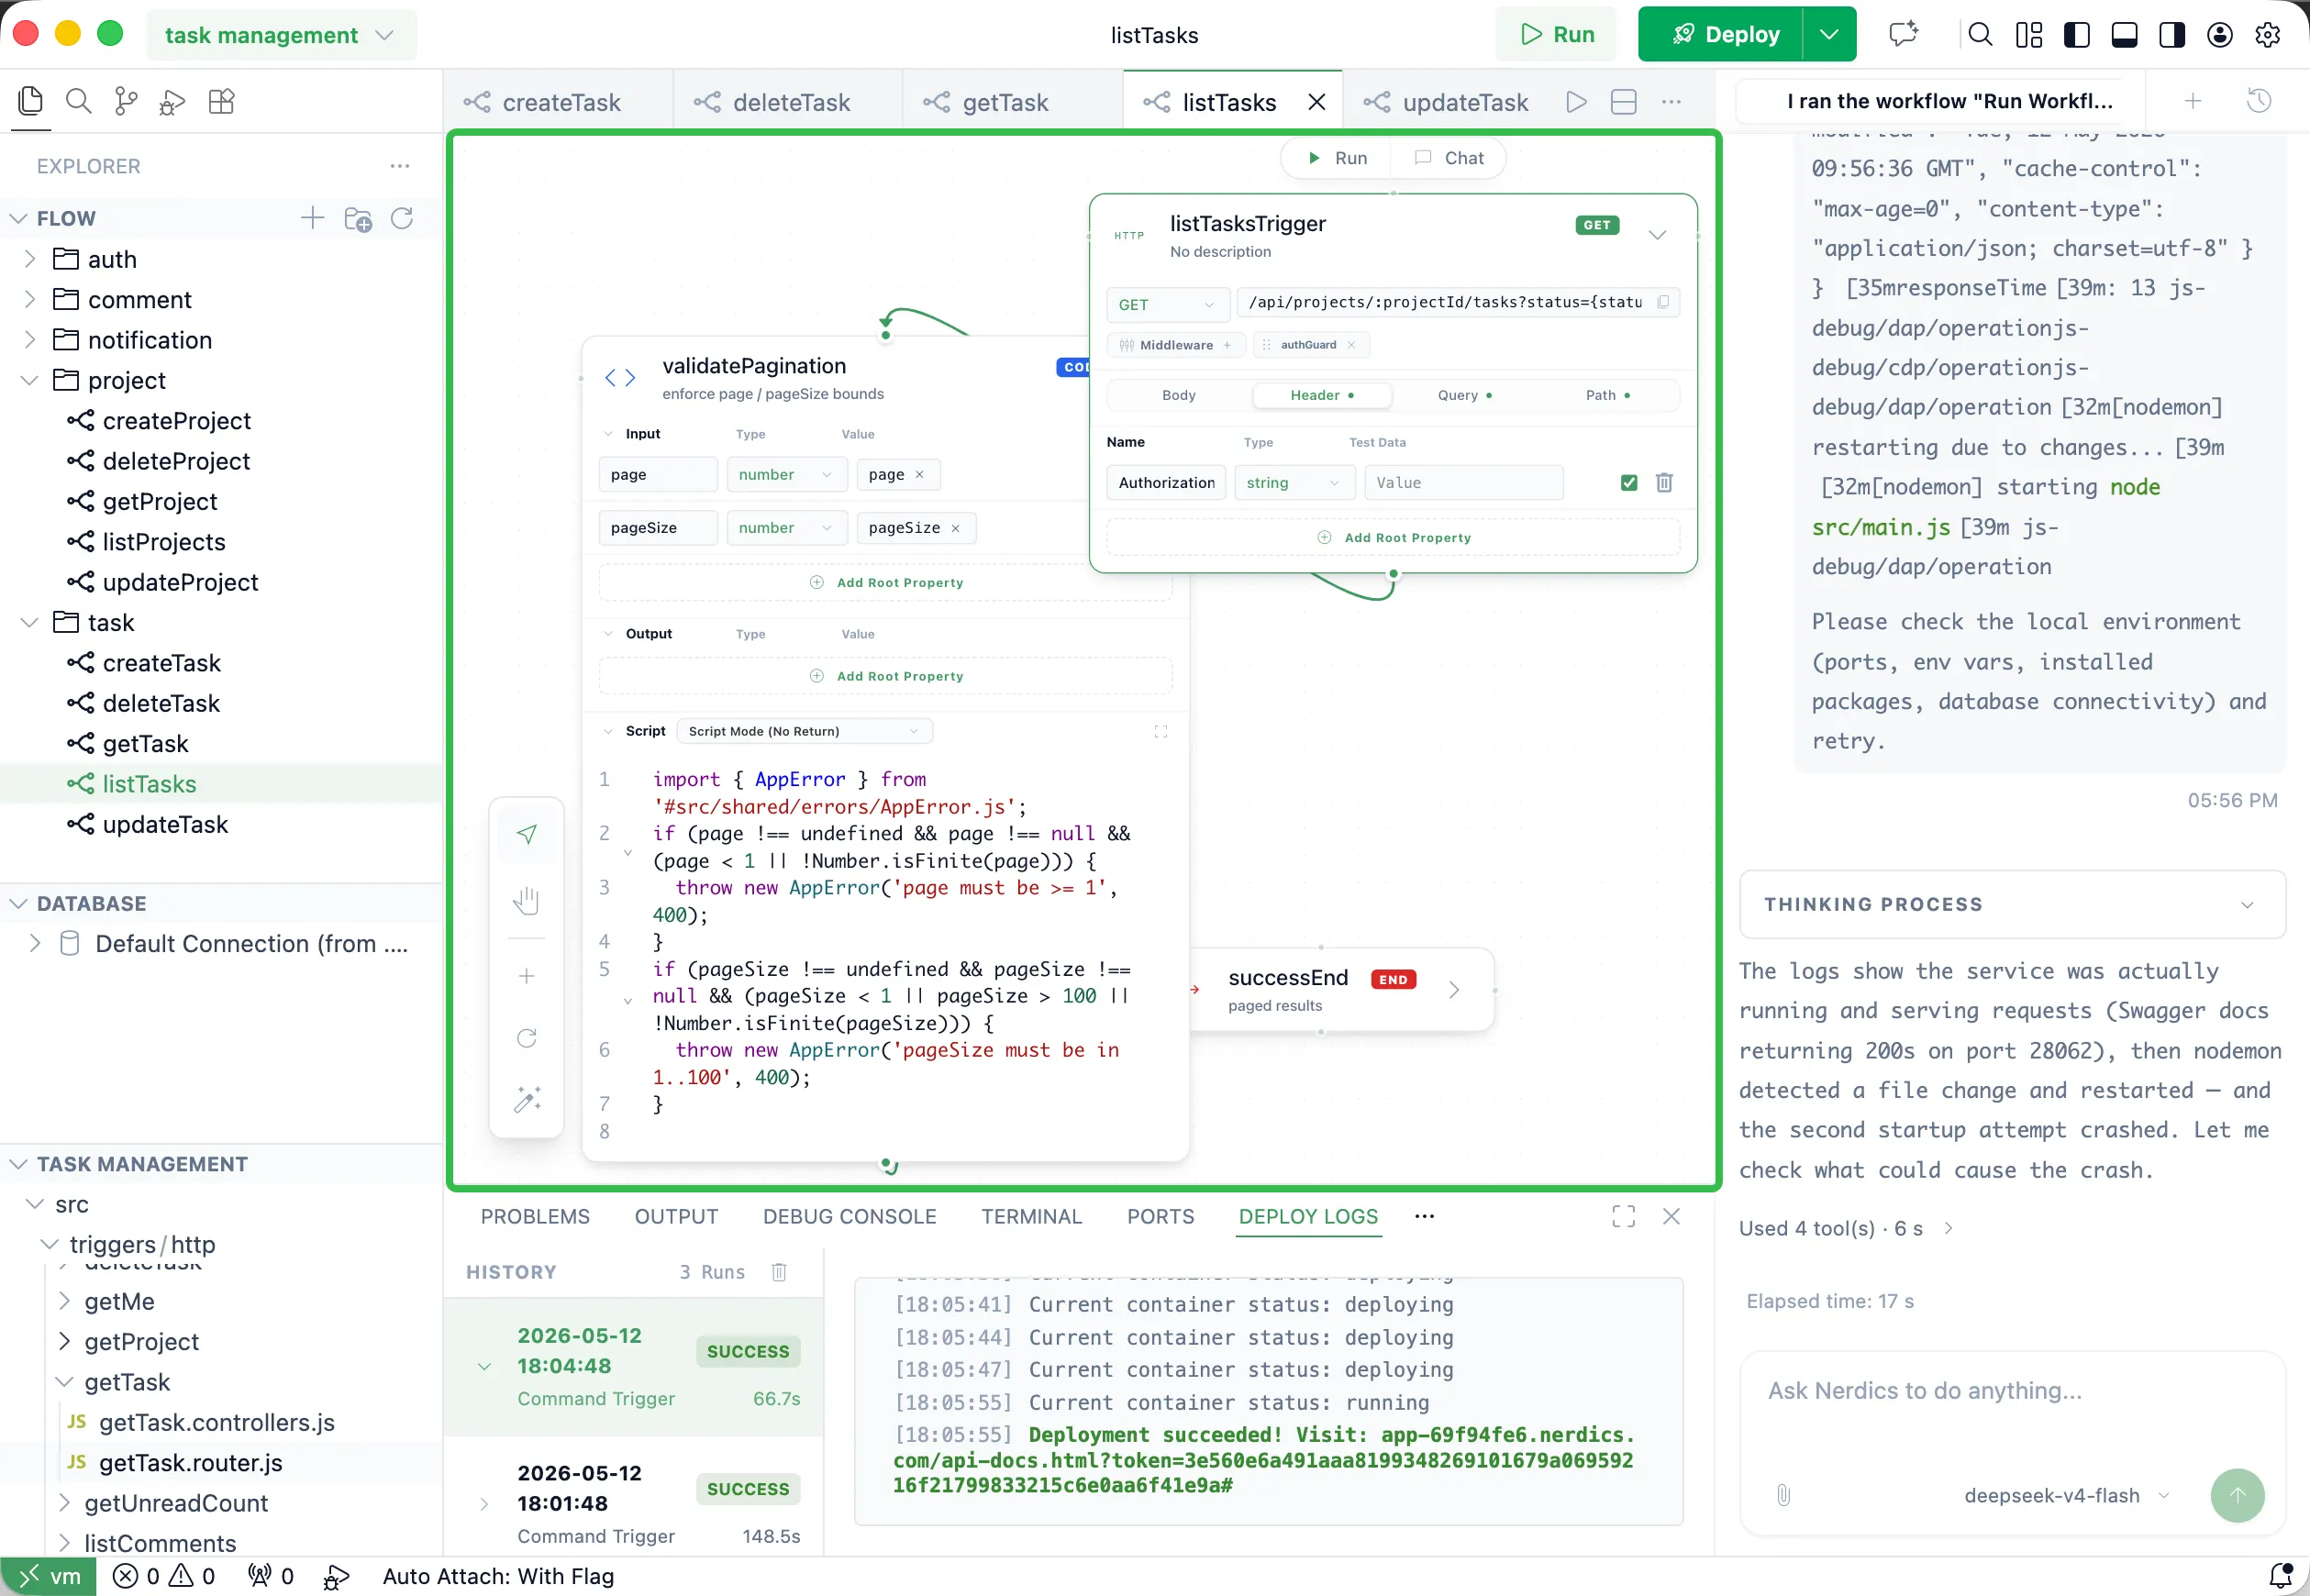
Expanded Flow View

Expand the visual flow to inspect node details. Most users do not need to edit nodes directly; ask the Nerdics development assistant in the chatbox to make adjustments.

Nerdics expanded visual flow with node details

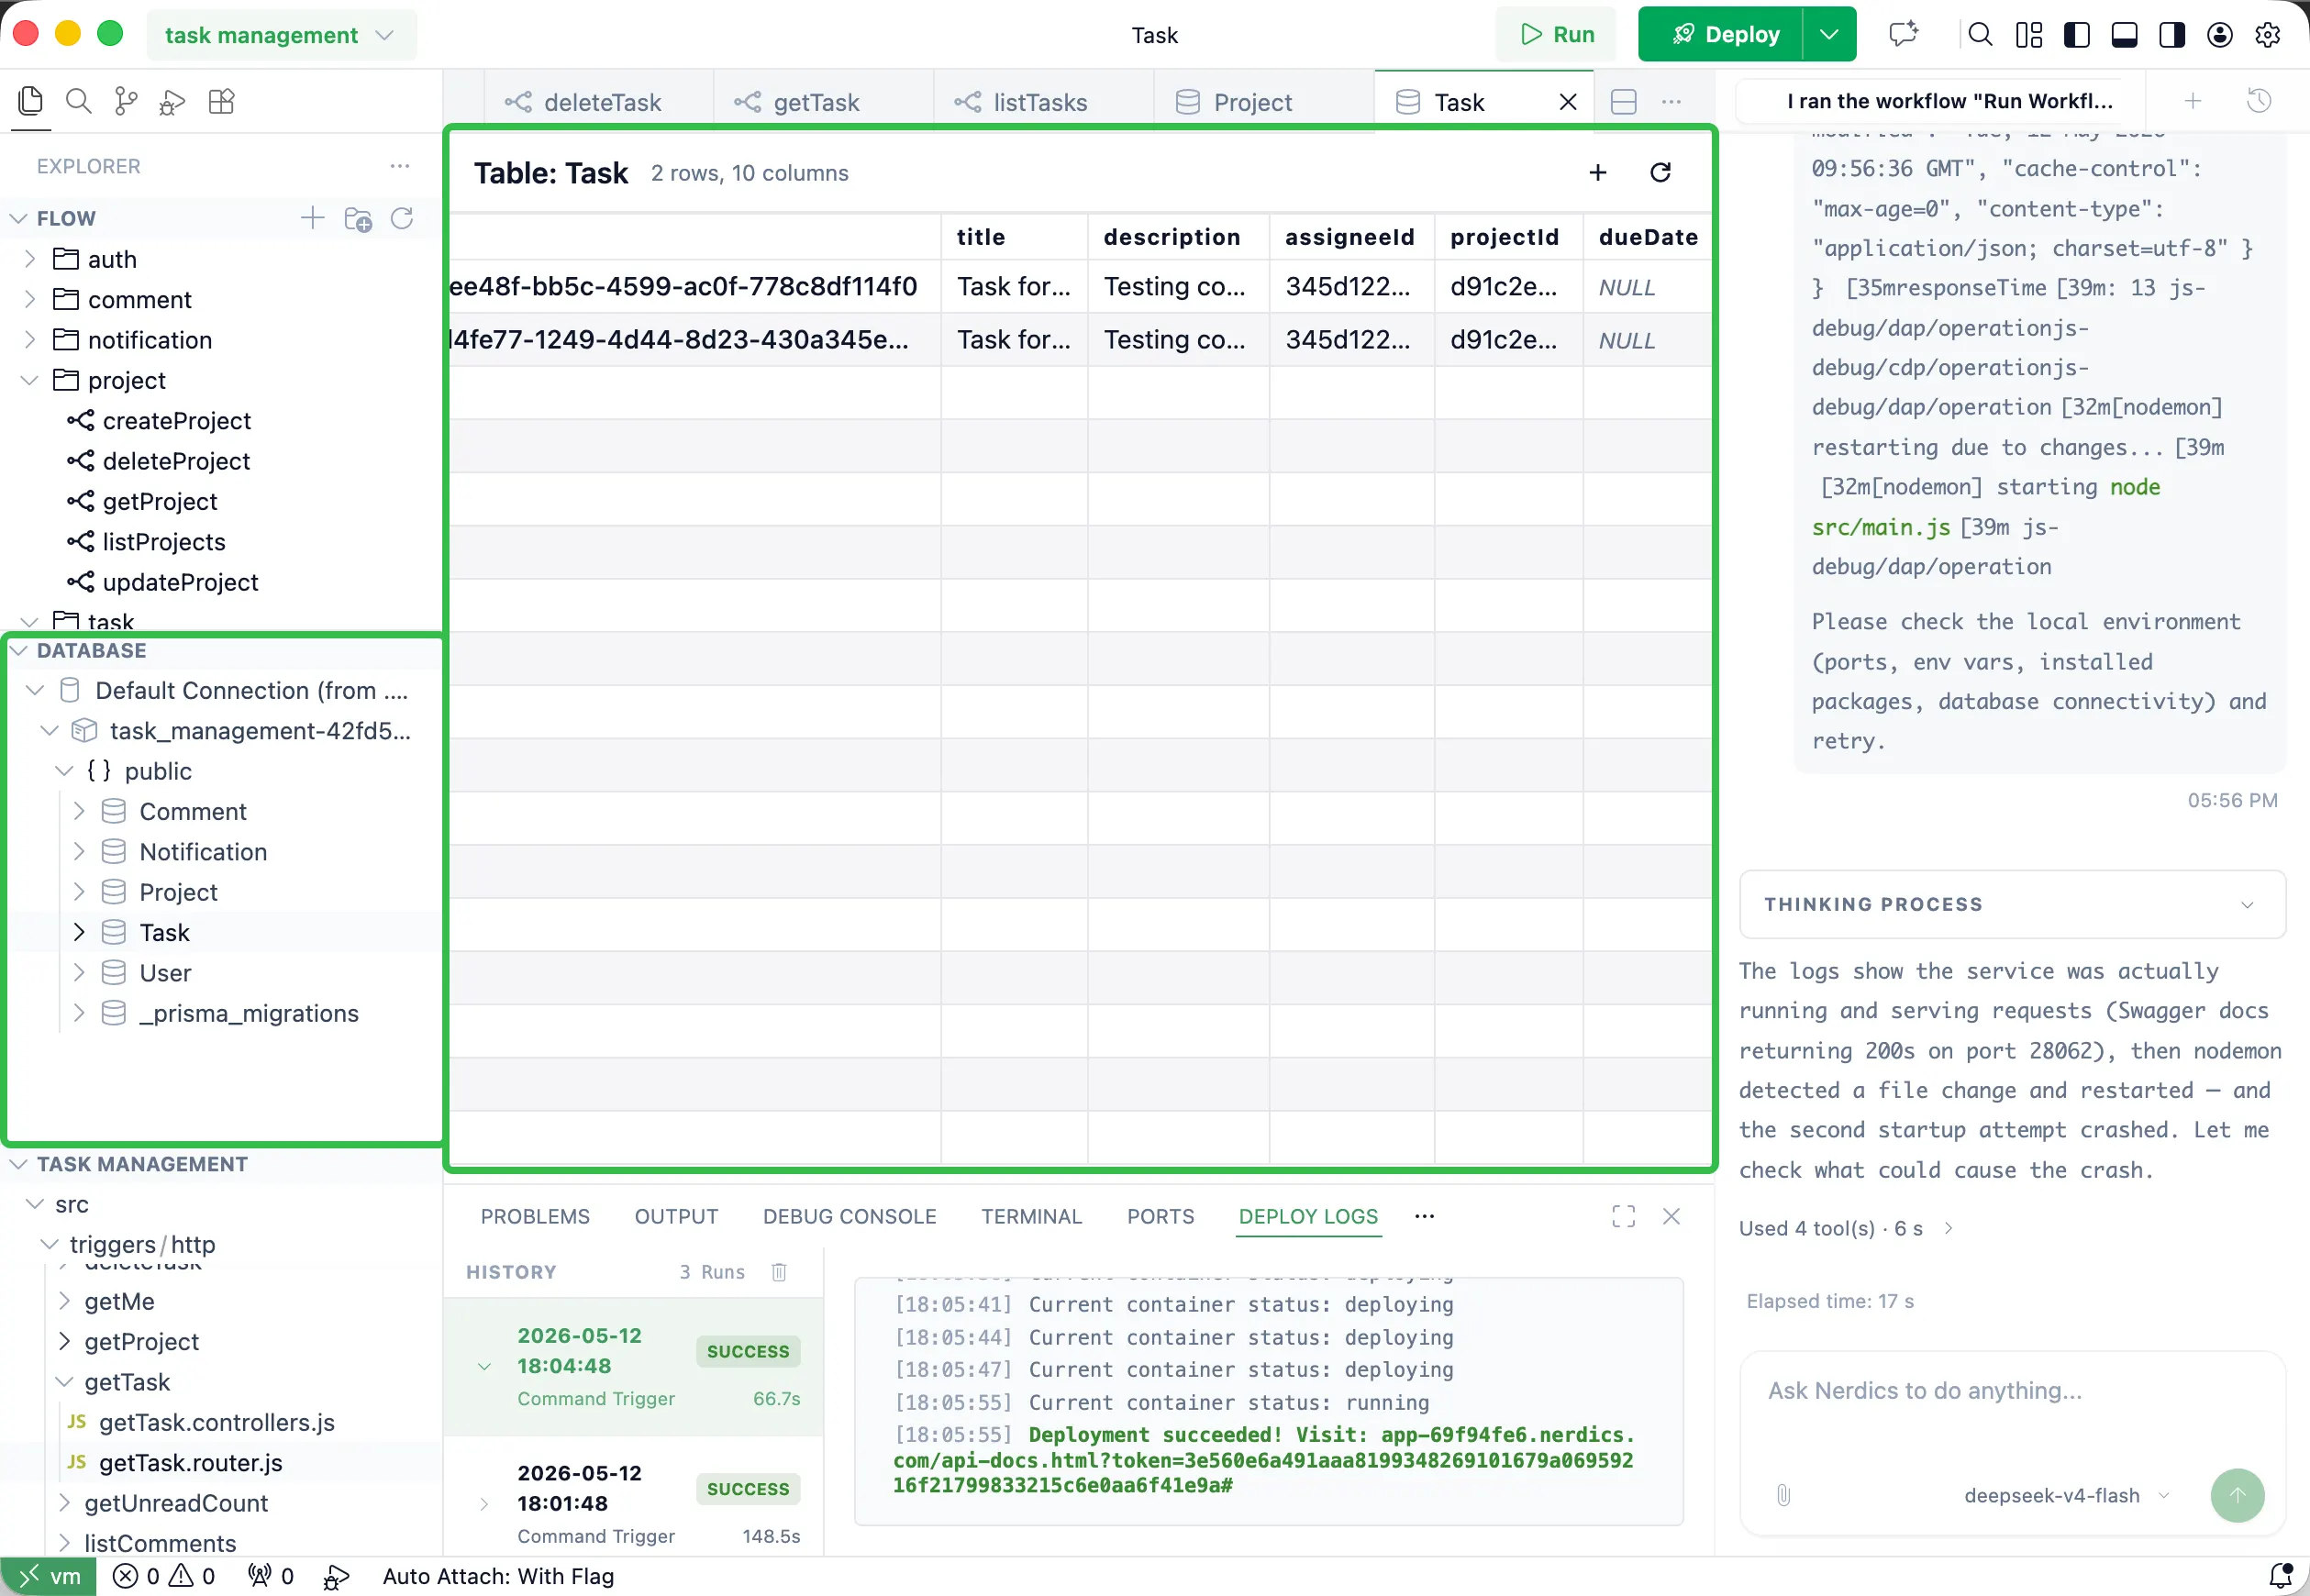
Database Area

The Database area shows the local database running inside the Nerdics container. For schema or data changes, ask the Nerdics development assistant in the chatbox.

Nerdics local database area

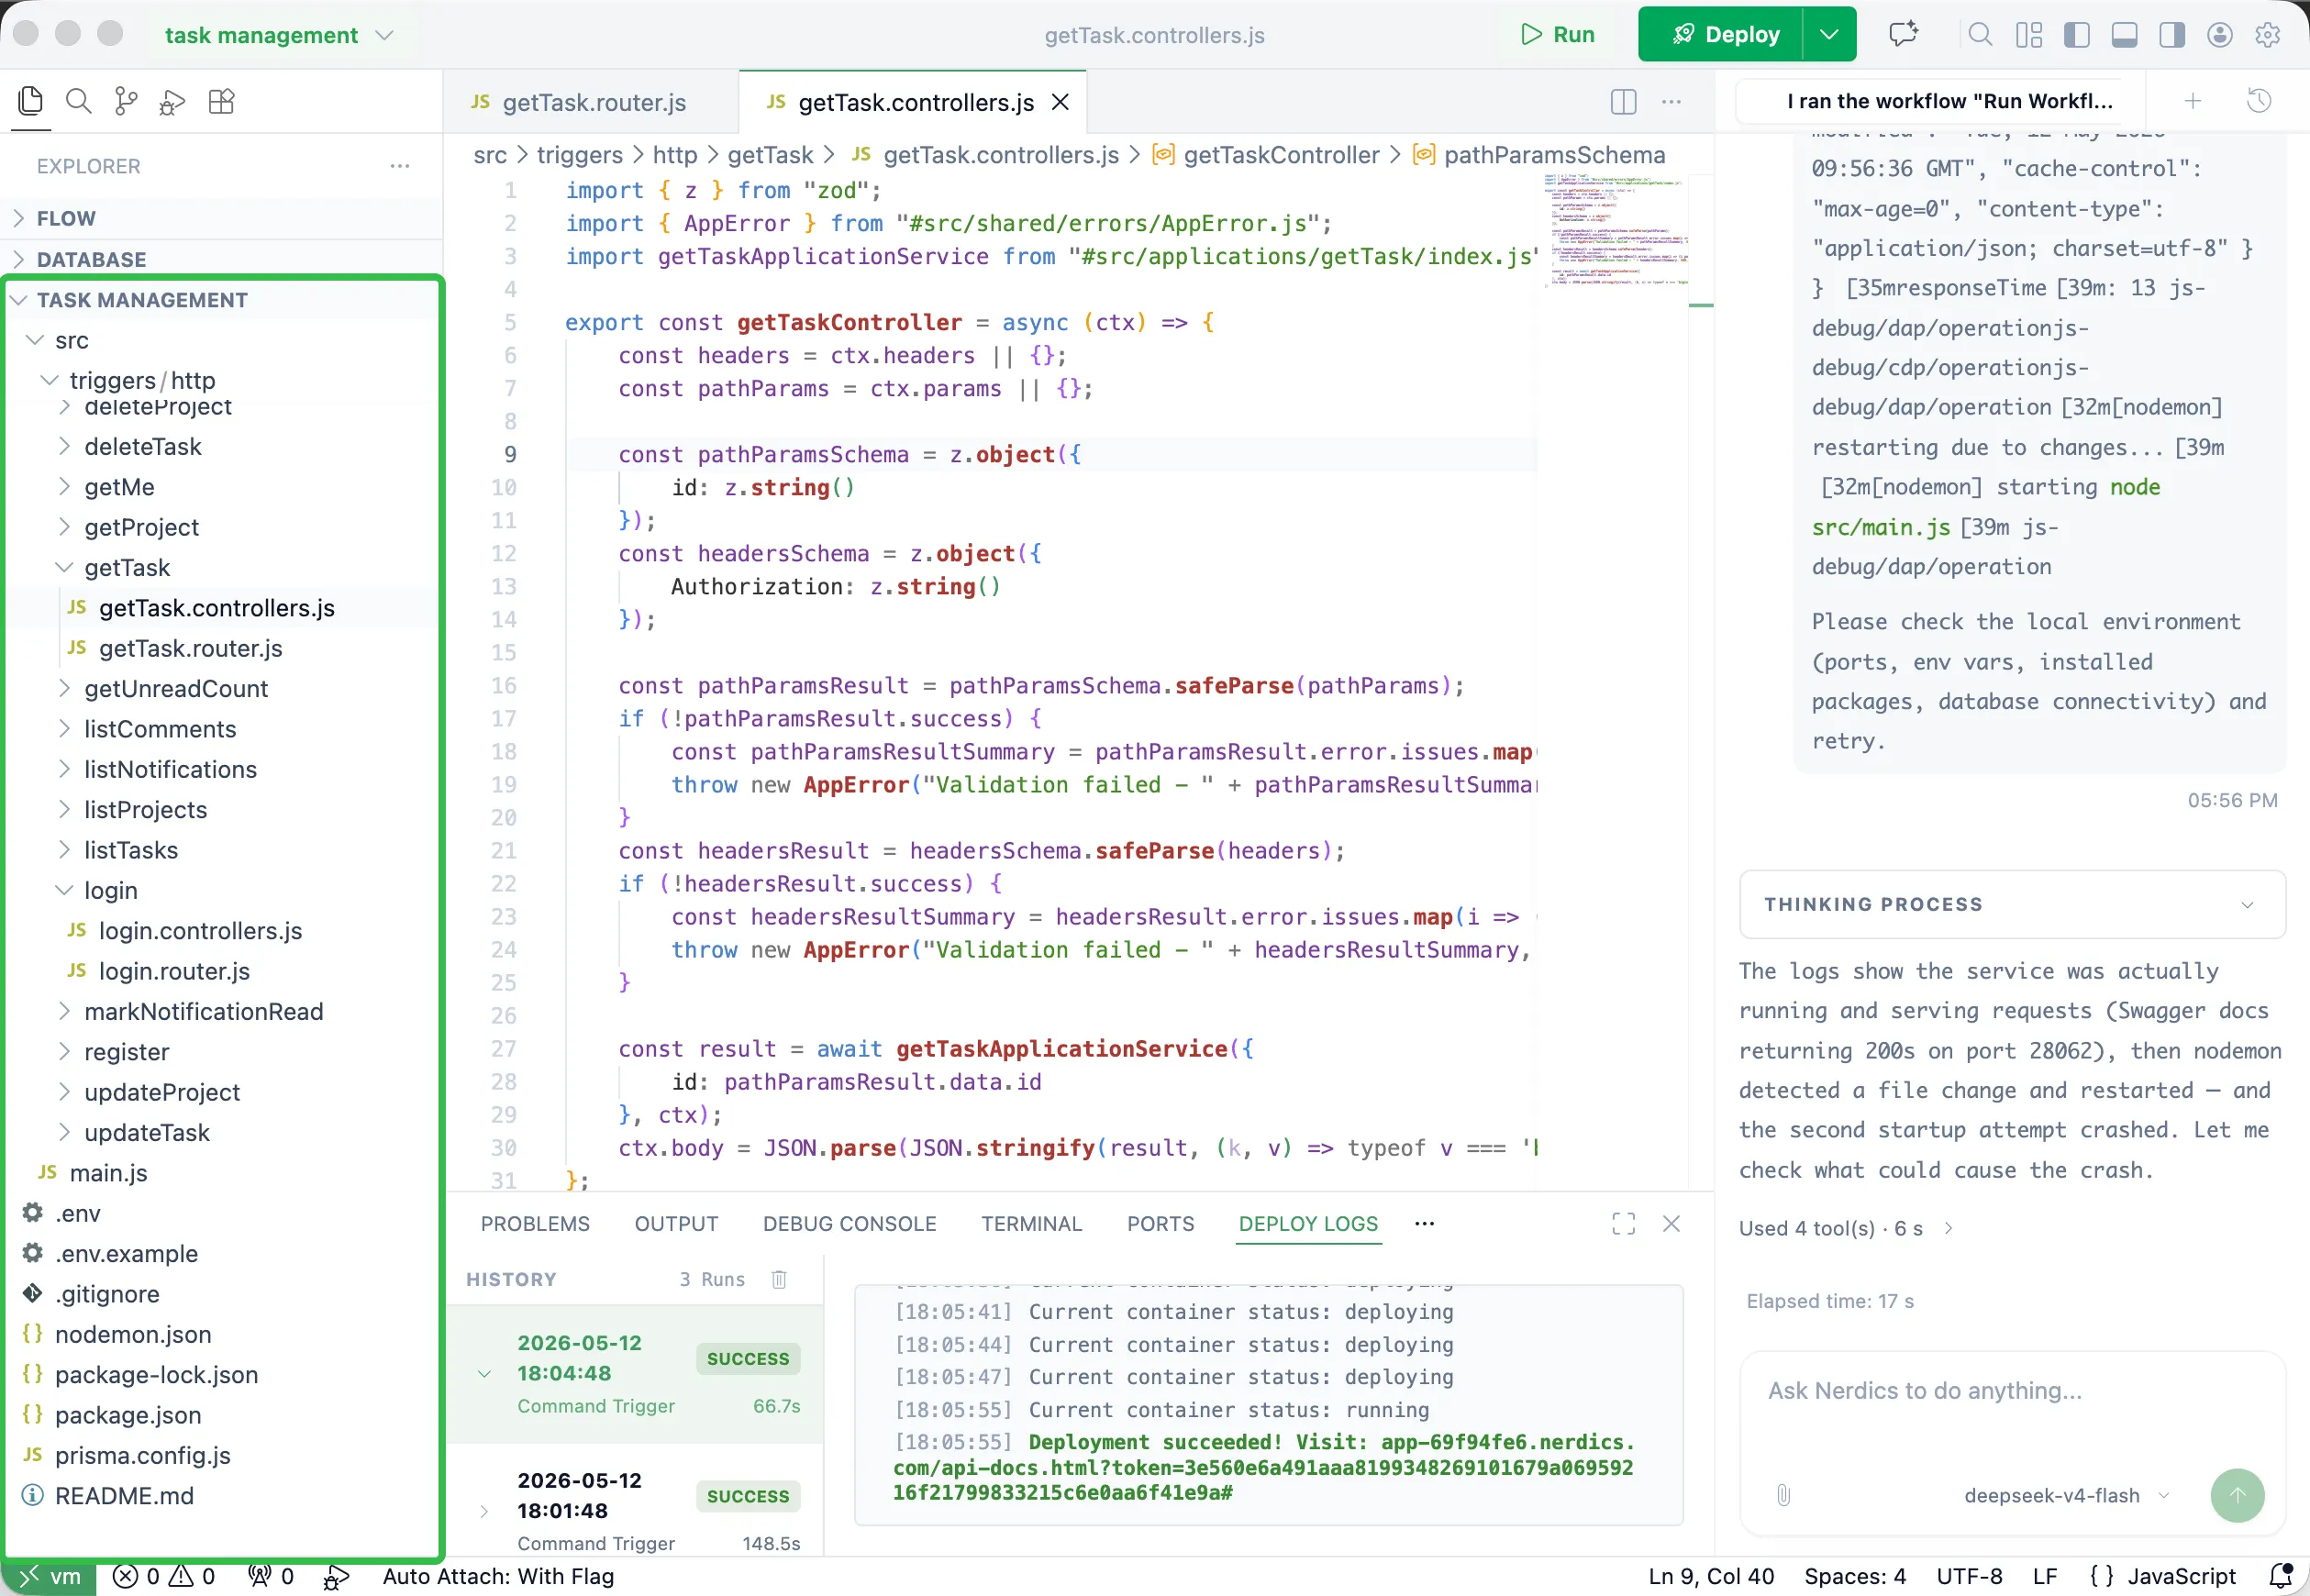
Source Code Area

The Source Code area maps source files between the virtual environment and the host machine. The code is clean and does not bind to Nerdics-specific content, so you can take it out at any time.

Nerdics source code area

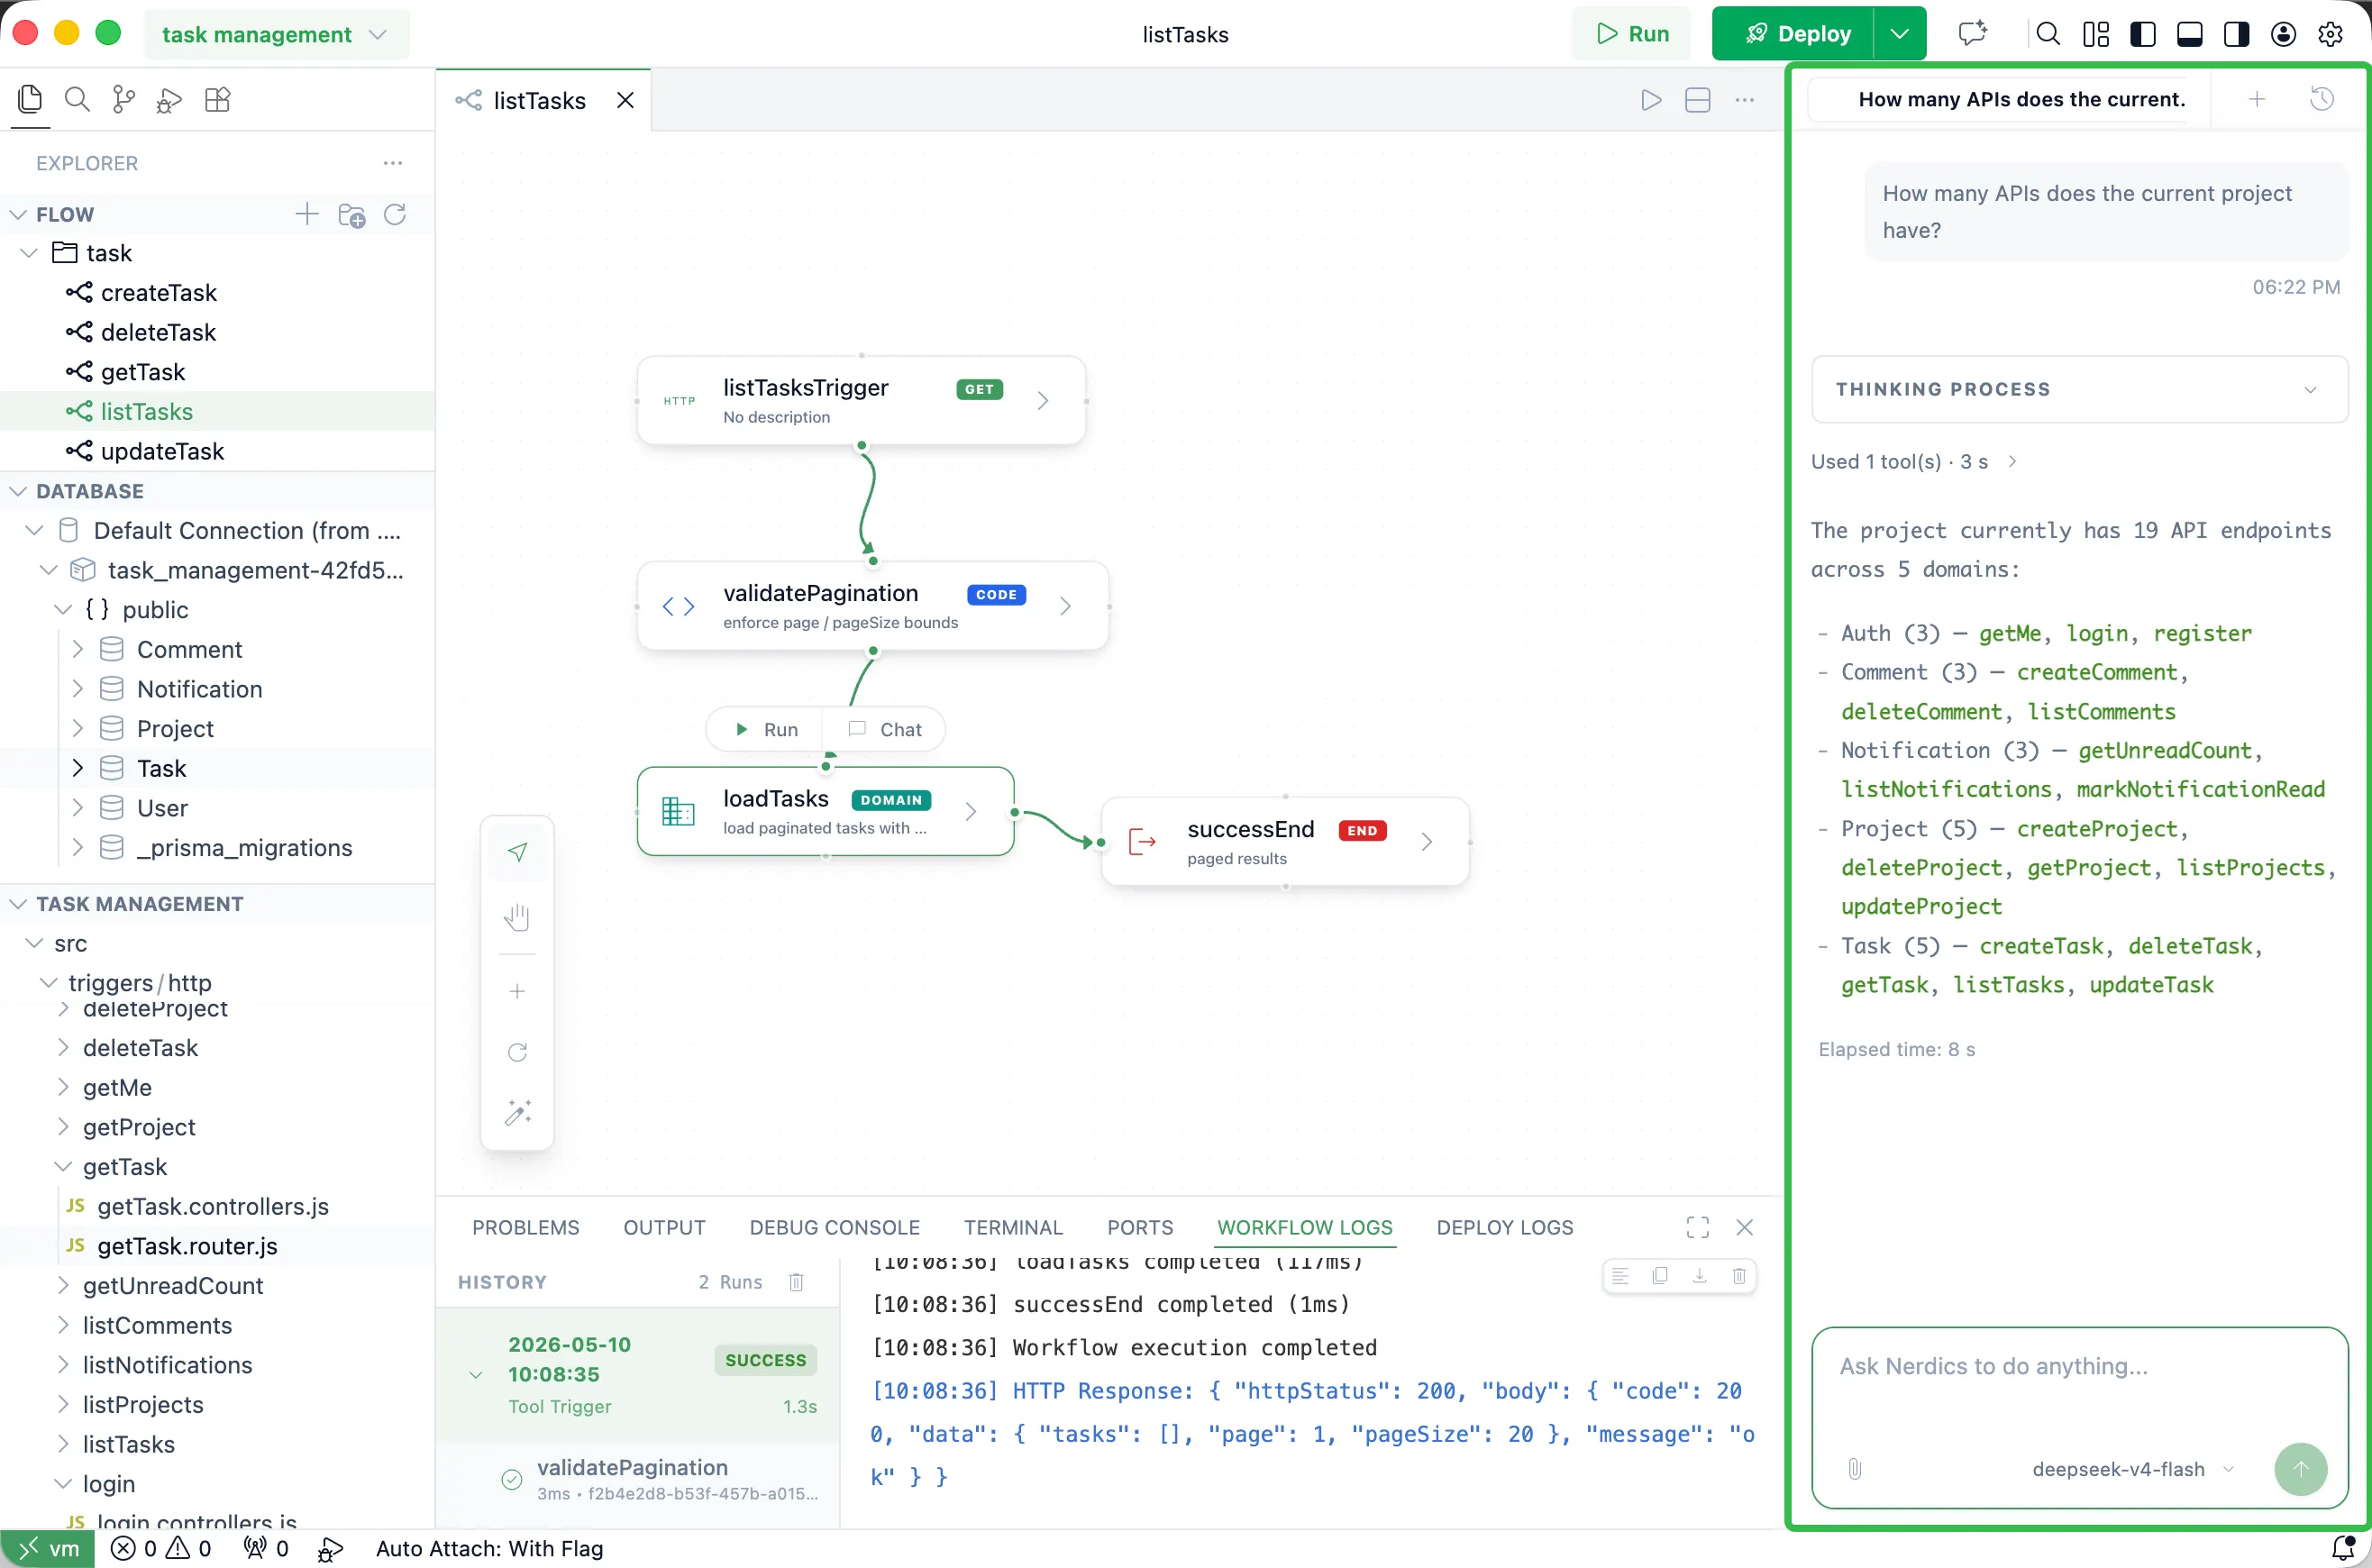
Chatbox Area

The Nerdics AI development assistant helps build complex projects, run flows automatically, fix errors automatically, and make targeted changes across the project.

Nerdics AI development assistant chatbox

Need a missing topic?

These docs are structured for the Nerdics backend engineering workflow. Additional guides can be added under the same left navigation groups as the product surface expands.